Documentation
Install from the ISO
The Margine ISO is a live system: it boots into a complete GNOME desktop with Margine's apps and settings already in place, running from RAM without touching your disk. With Secure Boot on there's one upfront step — trusting Margine's kernel-signing key — then you try the desktop and install from it with the graphical installer. This page walks the whole path in order, plus the optional TPM2 auto-unlock and autologin you can set up afterwards.
0. Get the ISO onto a USB stick
Download the latest margine-live.iso from the home page (Torrent or direct HTTP) and verify it against the published SHA256SUMS. Then write it to a USB stick (8 GB+; everything on it will be erased) with Fedora Media Writer, GNOME Disks ("Restore Disk Image"), or:
sudo dd if=margine-live.iso of=/dev/sdX bs=4M oflag=direct status=progress
# /dev/sdX = the stick itself (e.g. /dev/sdc), NOT a partition (sdc1)
1. Boot the live session
Boot from the stick (usually F12/F11/Esc at power-on opens your firmware's boot-device menu — that's the firmware's key, before GRUB). The Margine ISO boot menu then appears:

Stopping the auto-boot countdown: at the GRUB menu, tap the ↑ / ↓ arrow keys to halt the countdown and choose an entry. Don't press
Esc— on this GRUB it drops you into the command-line editor, not the menu. (Same trick later if you ever need to pick the previous deployment to roll back.)
2. Secure Boot — enroll Margine's key first
With Secure Boot off, skip to step 3 — Margine boots straight into the live desktop.
With Secure Boot on, do this first. Margine ships the CachyOS kernel (faster than stock Fedora — see Why Margine?) signed with Margine's own Machine Owner Key (MOK), not Microsoft's. Your firmware has never seen that key, so until you enroll it the live system stops with bad shim signature / you need to load the kernel first. That's expected, not a broken ISO. You enroll the key once, verify it yourself, and never see these screens again on this machine.
If you picked Install Margine and hit that error, press a key to return to the boot menu, then:
Choose Enroll Secure Boot key (MokManager) from the boot menu (Margine ships this entry so you never have to hunt for it).
Pick 'Enroll Secure Boot key (MokManager)' MokManager opens — choose Enroll key from disk.

Highlight 'Enroll key from disk' and press Enter Pick the Margine boot volume — your USB stick, or the
…/CDROM(0x0)device in a VM.
Select the Margine boot volume Open the
EFI/folder.
Enter EFI/ Select
MOK.der(next toBOOT/andfedora/).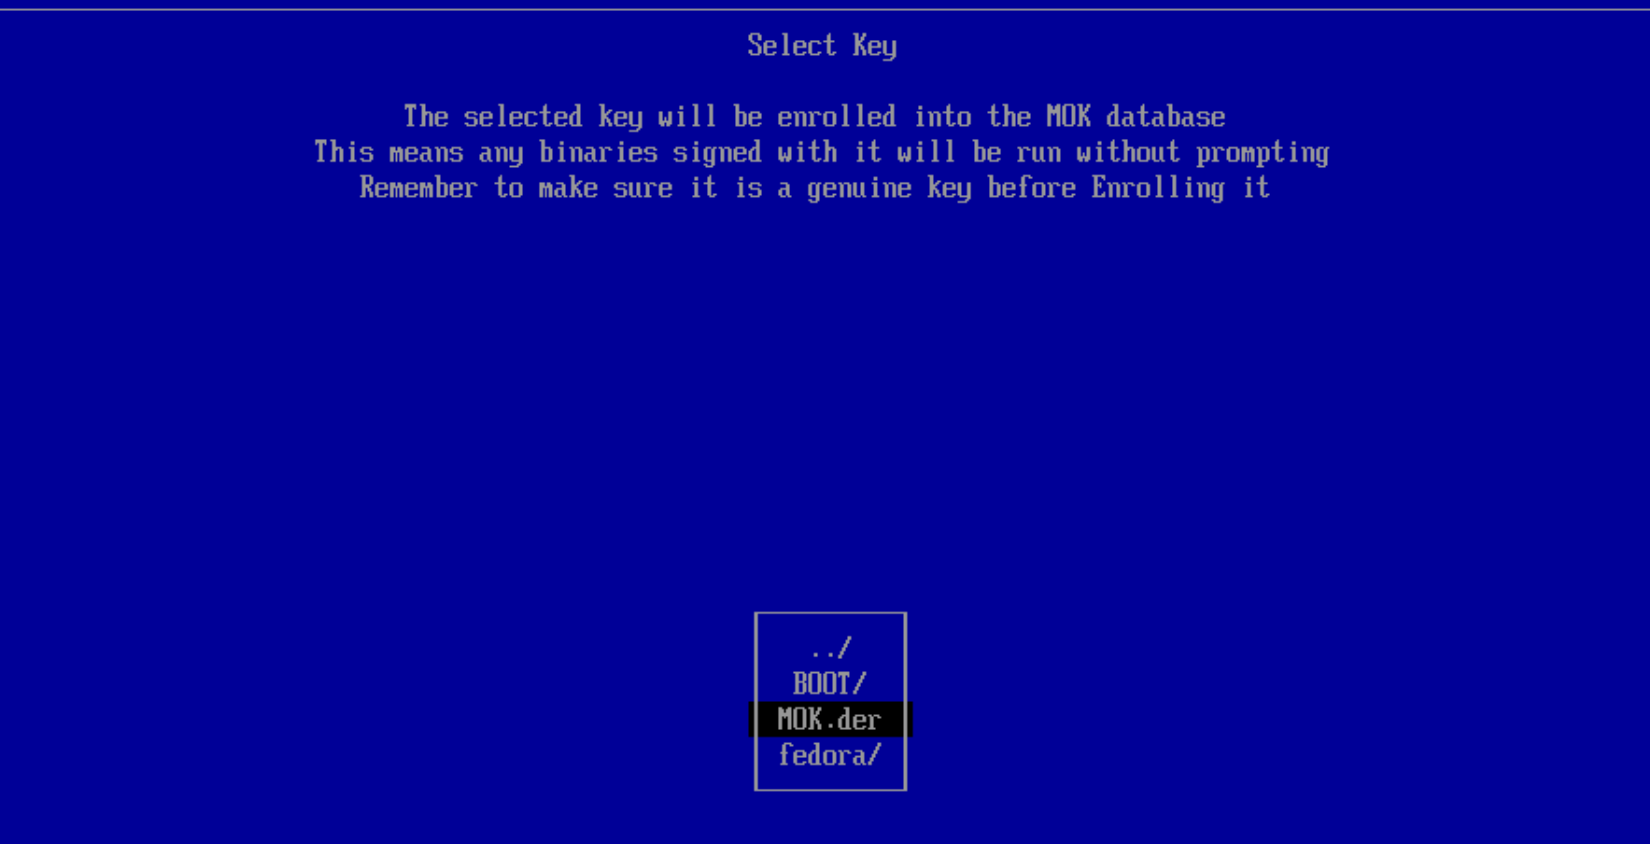
Pick EFI/MOK.der — Margine's signing certificate At [Enroll MOK] choose View key 0 first — always inspect a key before trusting it.
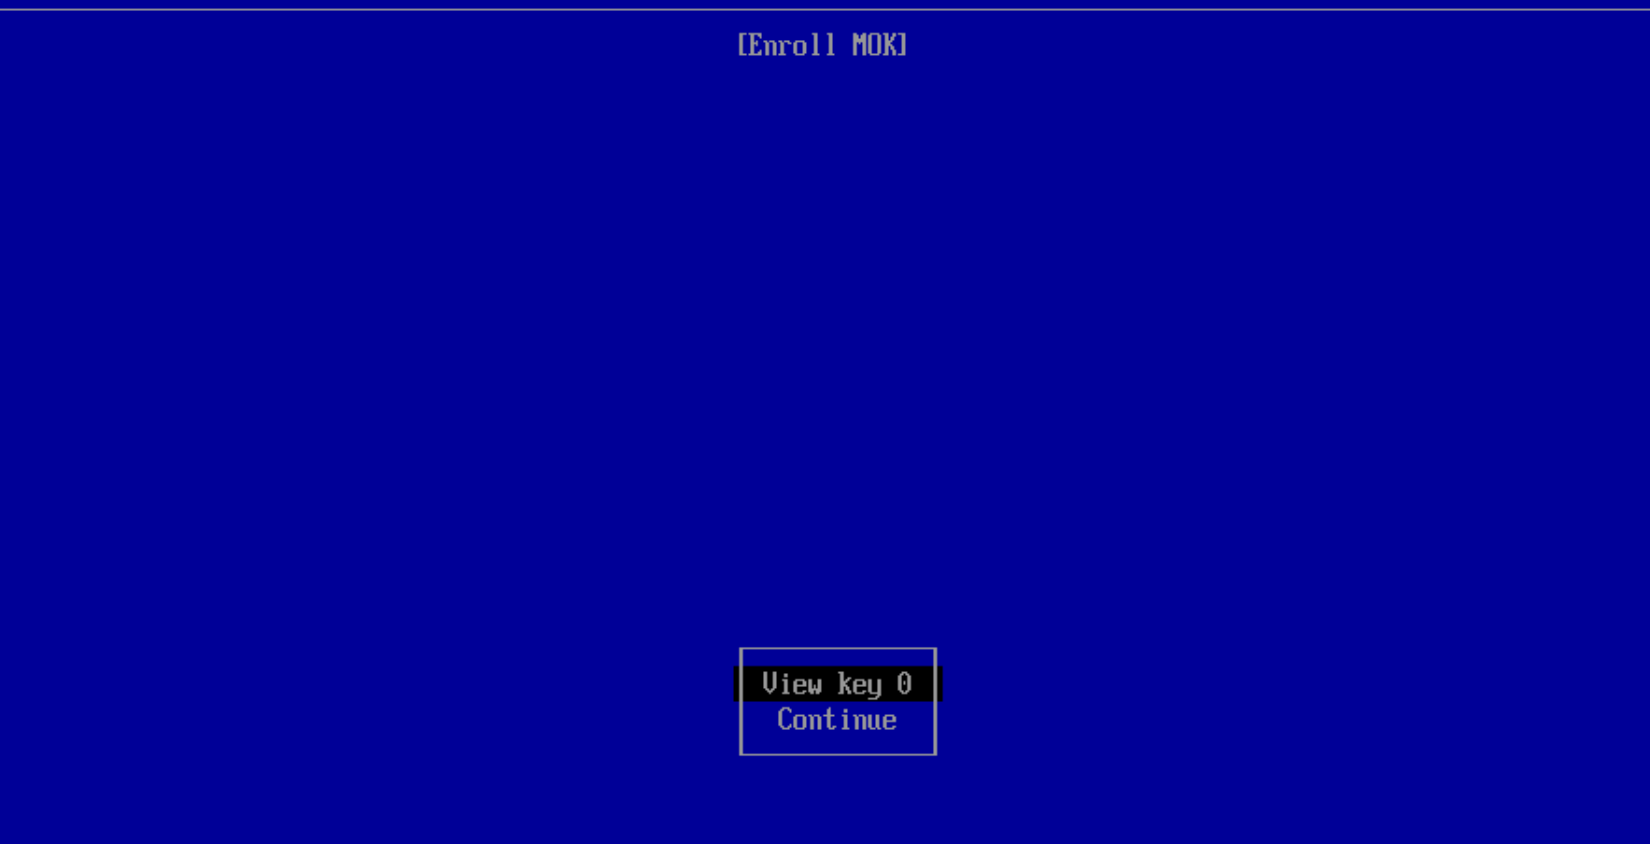
Choose 'View key 0' to inspect the certificate Verify the certificate. Issuer and Subject both read
CN=Margine MOK Signing Key, valid 2026‑05‑26 → 2036‑05‑23, and the SHA‑1 fingerprint must be exactly:E9 48 3E 89 67 28 B7 6A E0 5E 72 8D 68 14 37 87 F5 0B B0 55If anything differs, do not enroll — that is the whole point of this screen.
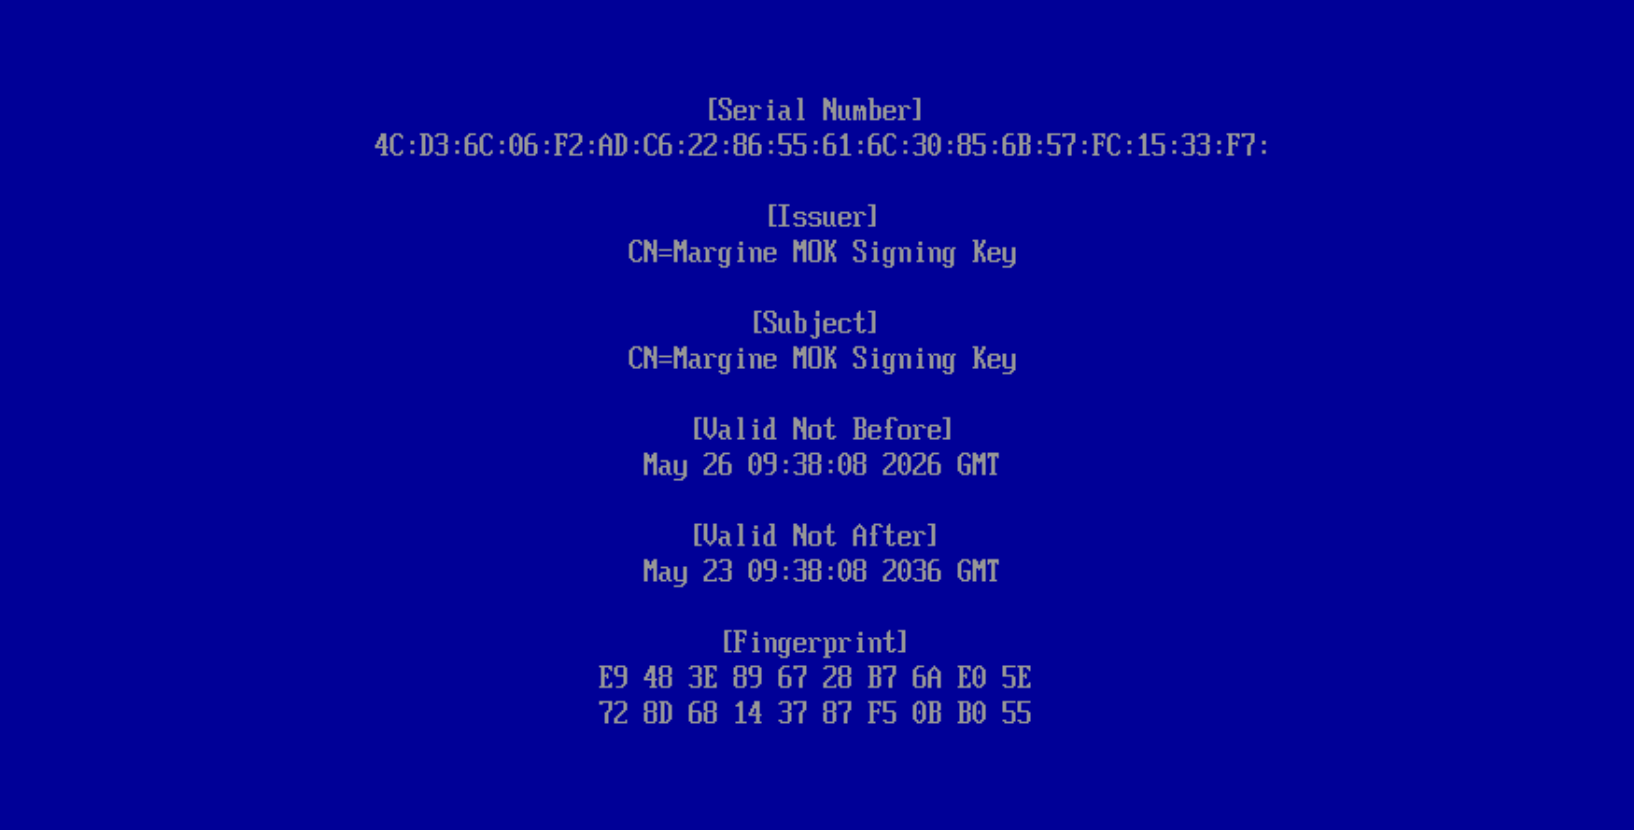
Verify CN=Margine MOK Signing Key and the fingerprint E9 48 3E … Back out and choose Continue.
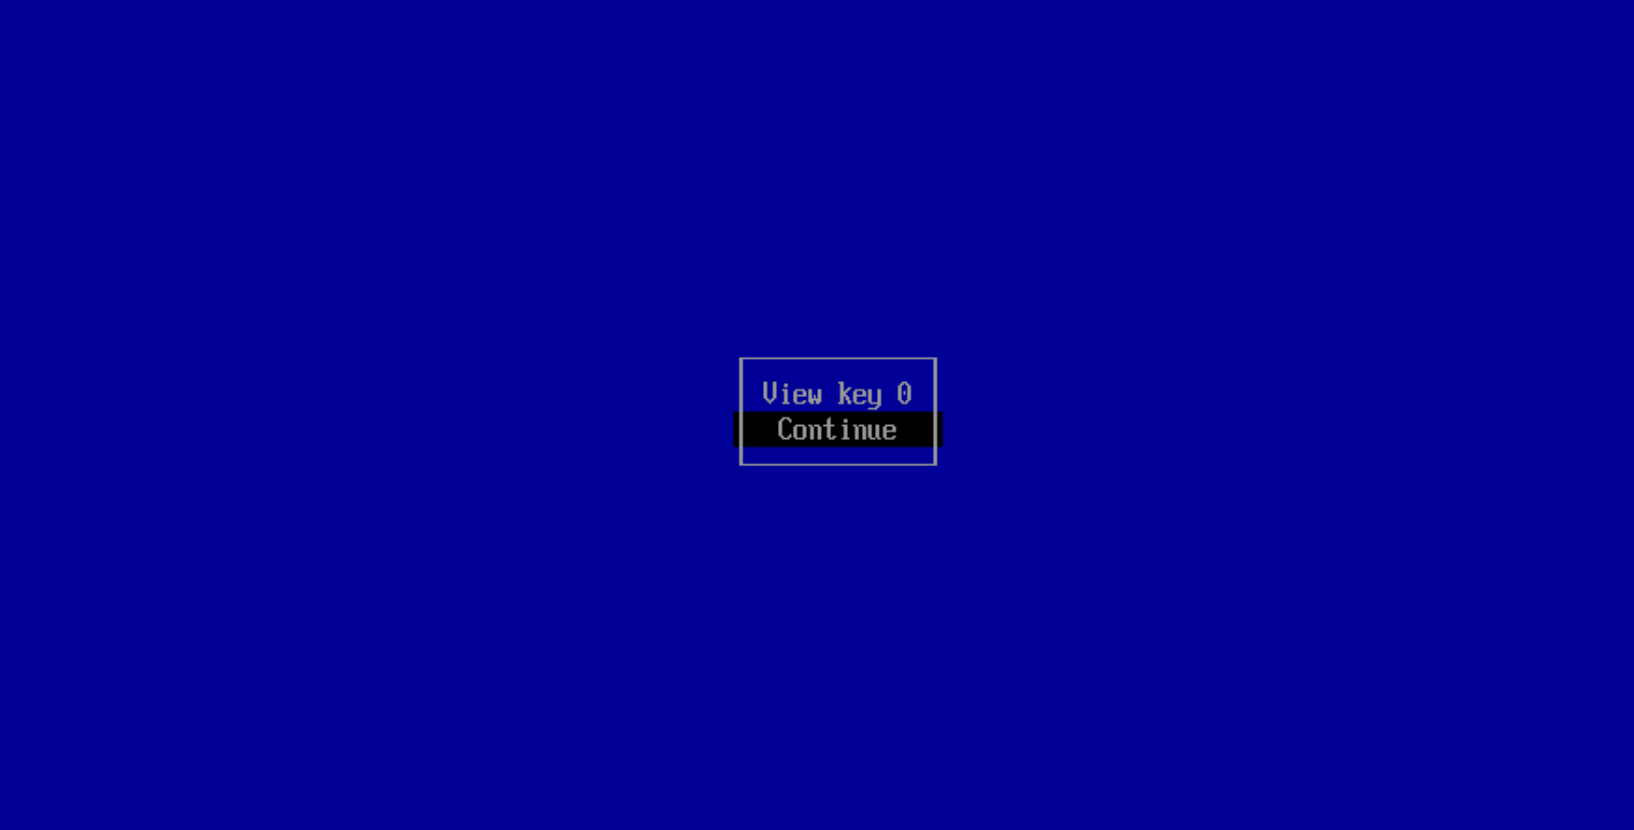
Continue to enroll Confirm Yes at "Enroll the key(s)?".

Yes — enroll Margine's key Choose Reboot. On the next boot the CachyOS kernel loads cleanly under Secure Boot — pick Install Margine and continue below. You won't see these screens again.

Reboot — enrollment done
No password on this path. Enrolling a key you picked from disk needs no passphrase — verifying the fingerprint on screen is the security check. (A passphrase,
margine-os, only appears on the other enrollment path — see the passphrase note at the bottom.)
You then land in a full Margine desktop — feel free to poke around: this is exactly what gets installed.
3. Install Margine
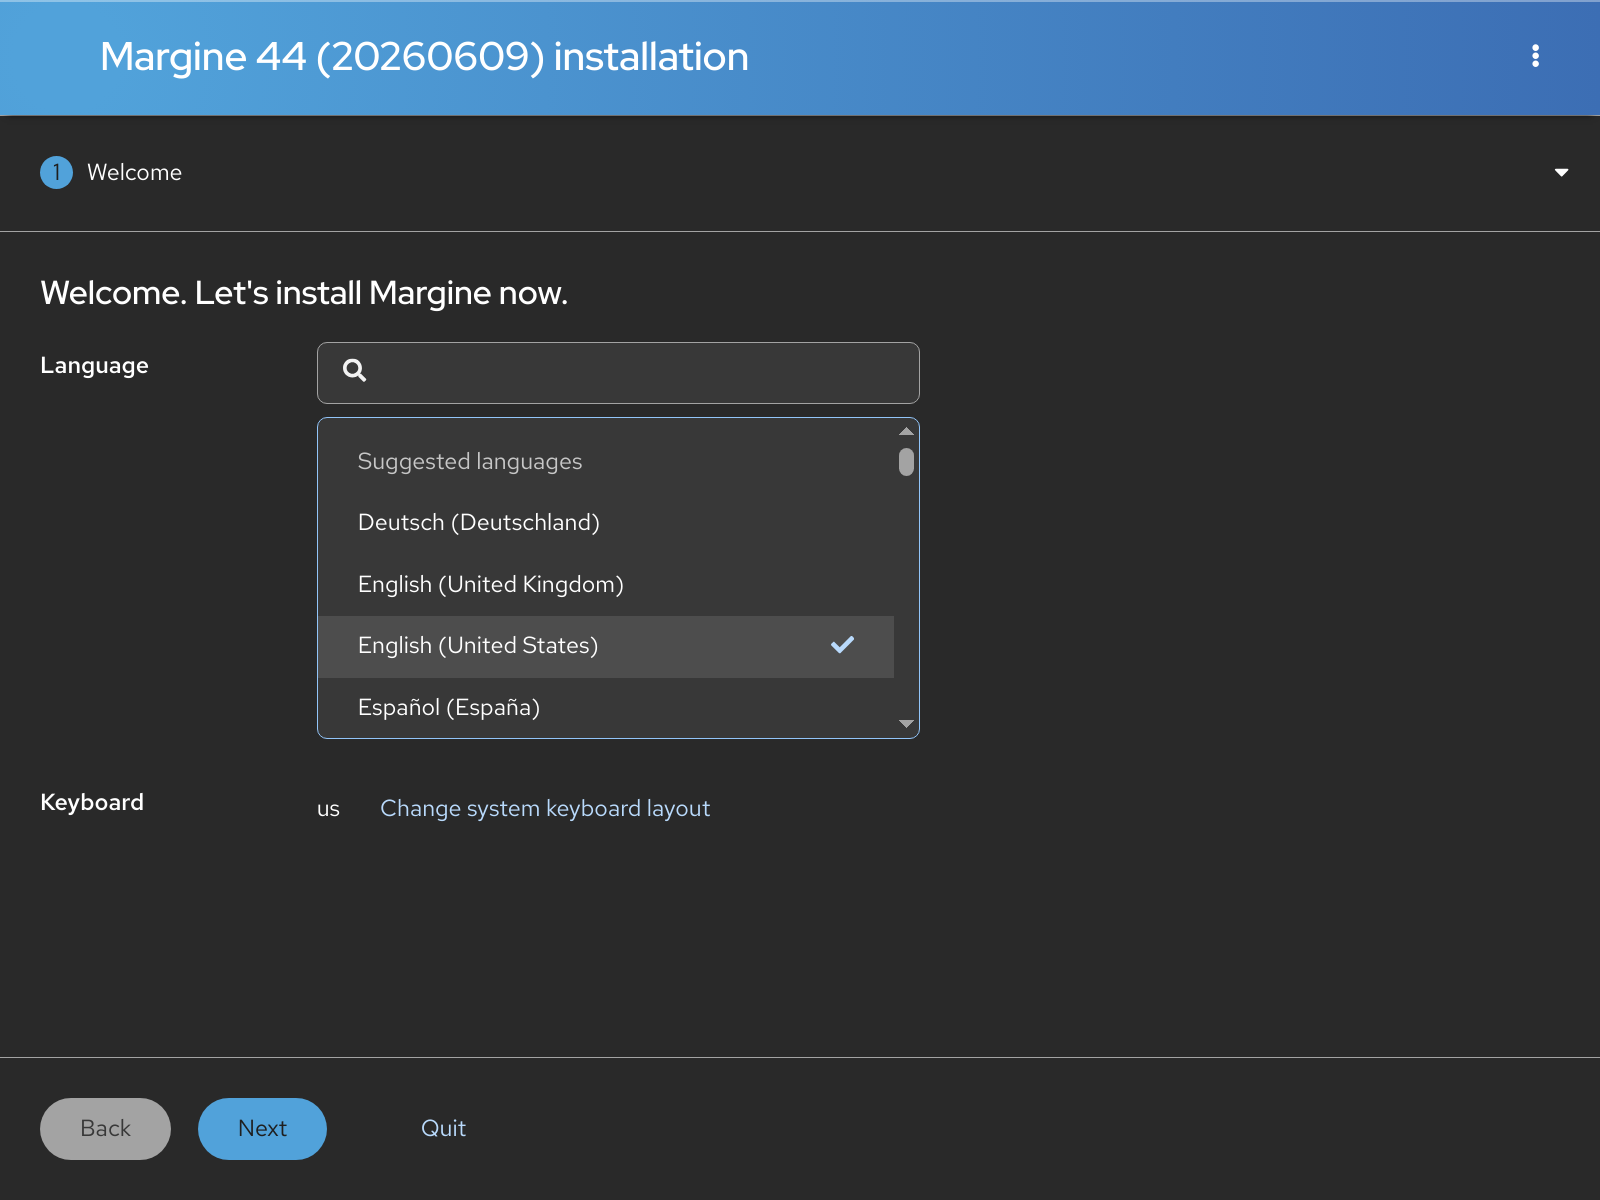
Launch Install Margine from the desktop or Activities. The installer is Anaconda's Web UI — a short guided flow starting from language and keyboard:
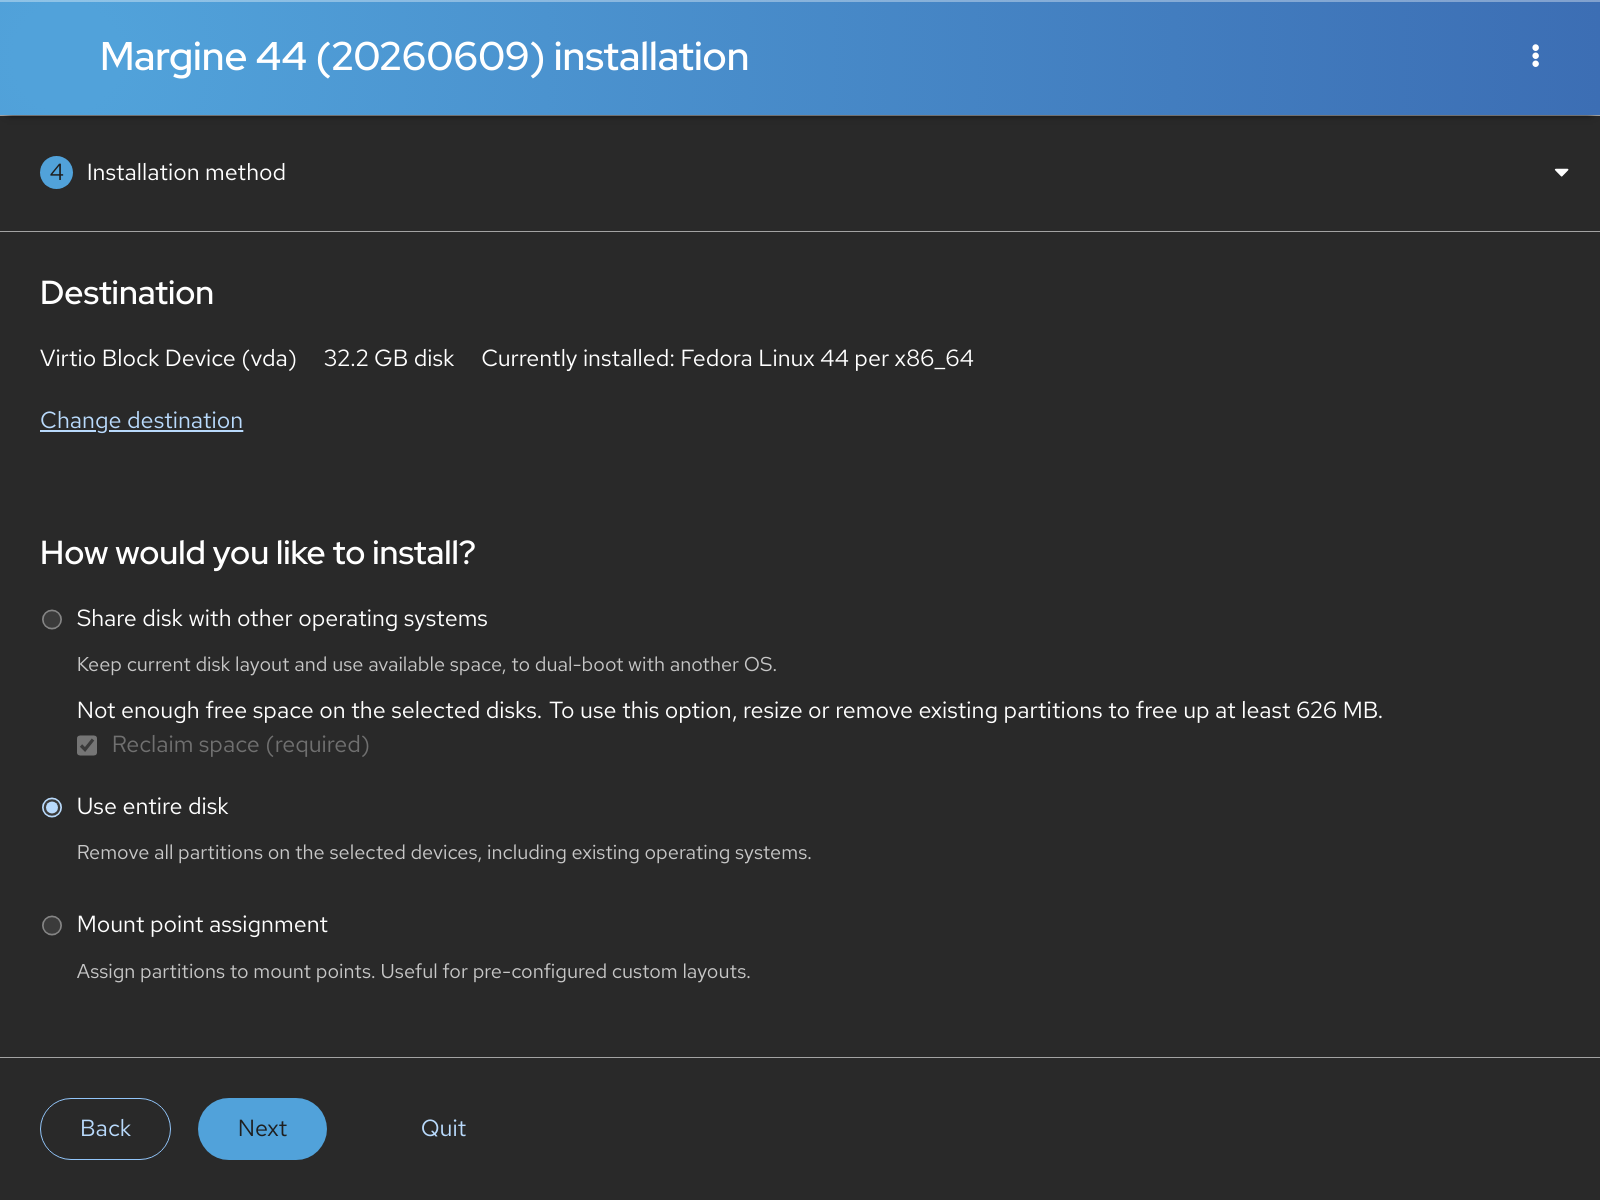
Pick the target disk. Use entire disk is the recommended clean install; Mount point assignment is for custom layouts (advanced).
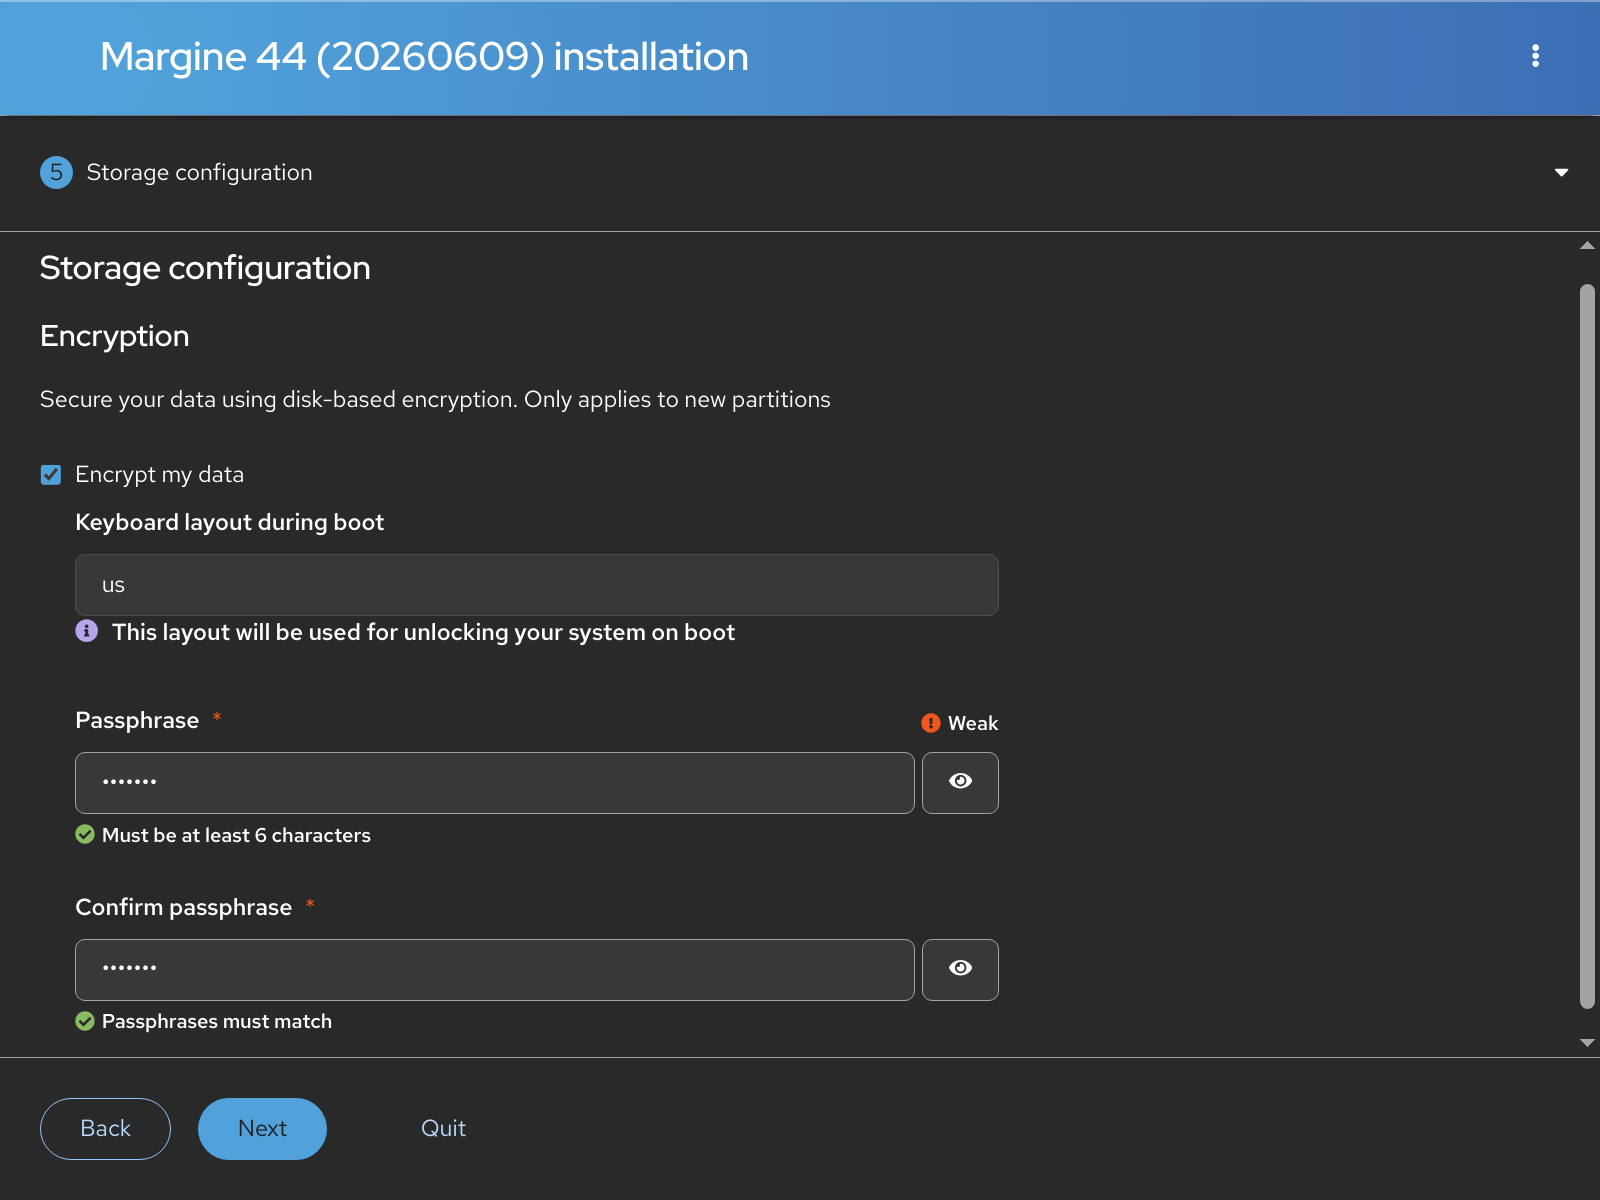
On the storage step, tick "Encrypt my data" and choose a strong passphrase (Btrfs is already the default filesystem). This box is not pre-checked — you have to enable it, and we strongly recommend you do: it gives you LUKS2 full-disk encryption, and you can add TPM2 auto-unlock afterwards (step 6) so you only type the passphrase as a recovery fallback. You'll type this passphrase at every boot until then; the short one in the screenshot is a throwaway test value.
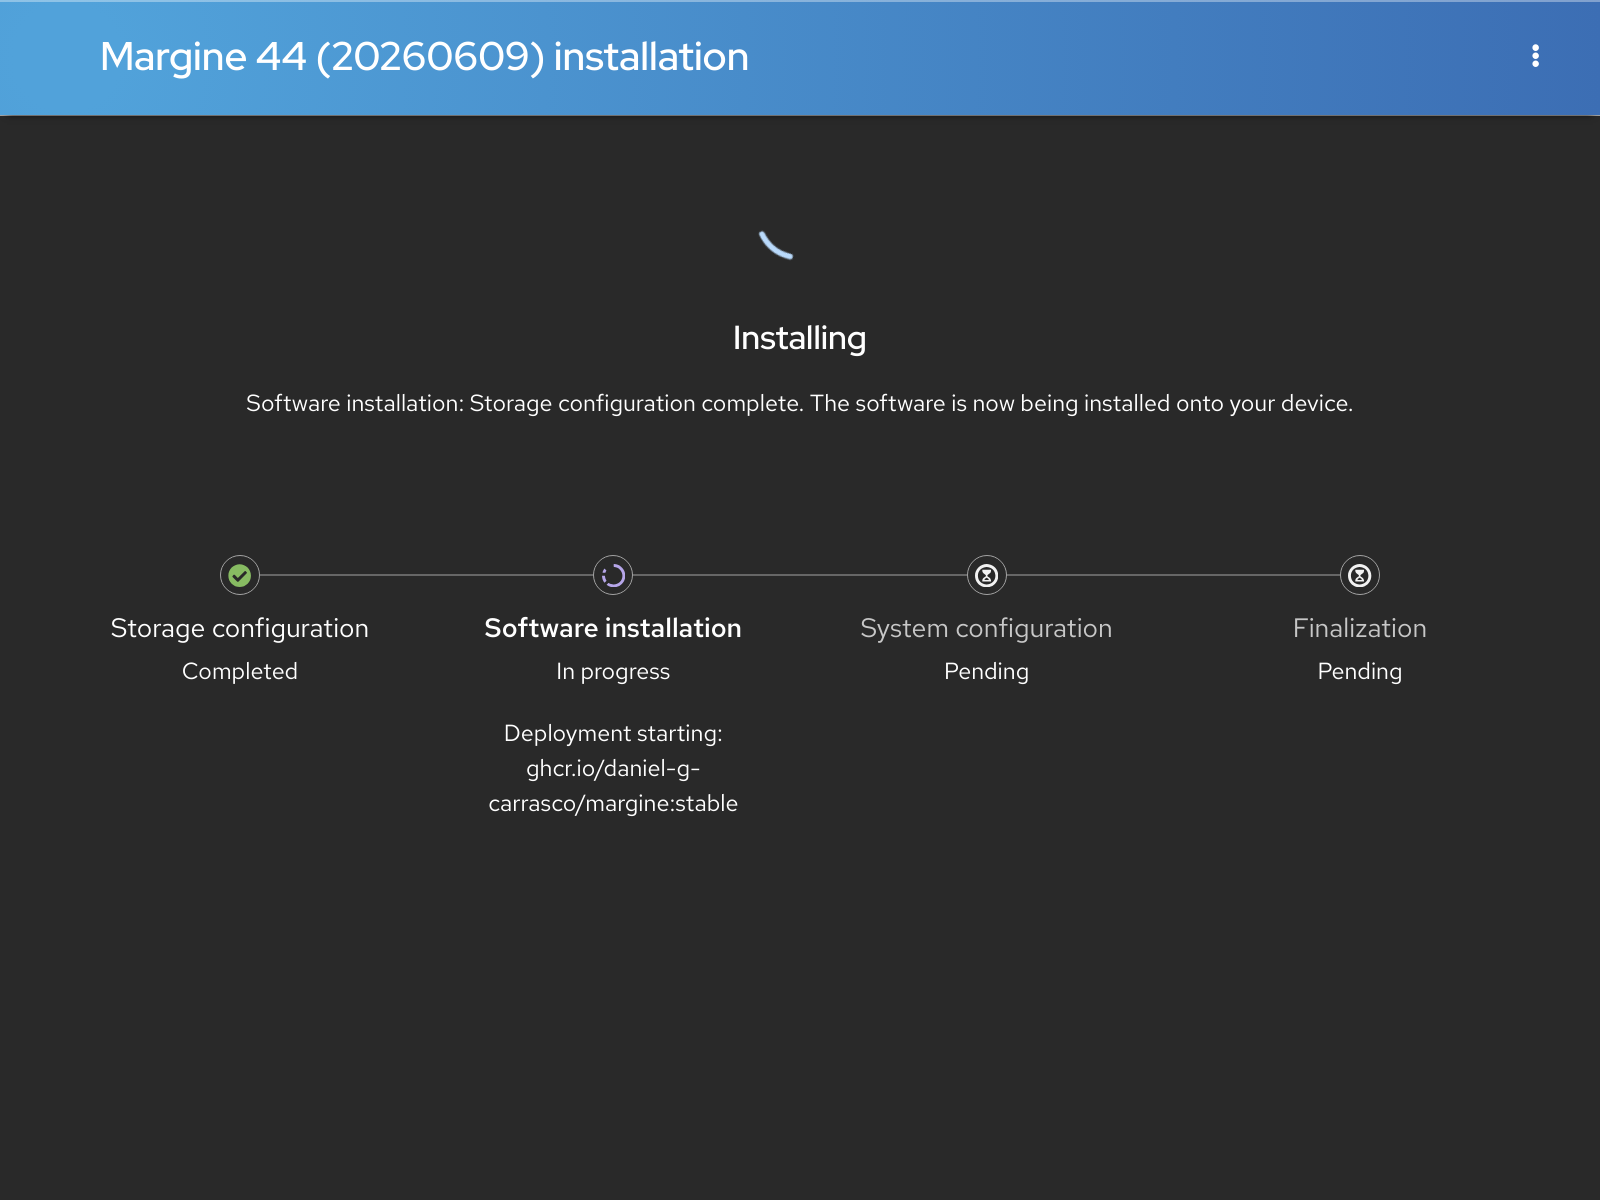
The review step shows the final layout (EFI + /boot + encrypted Btrfs subvolumes for /, /home and /var). The installation itself takes a few minutes: the installer deploys the same image the live session runs and bakes the preinstalled Flatpaks into the target disk, so the first login needs no downloads.

4. Reboot into your system
Remove the stick and reboot. If you enrolled Margine's key in step 2, the system boots straight in — the key lives in your firmware now, so there's no second blue screen. (If you installed with Secure Boot off and enable it later, you'll do the step-2 enrollment then.)
5. First login
Log in, let GNOME settle, and run the one-time user-state setup from a terminal (Super+Return):
ujust margine-bootstrapThat applies the home-folder layout, Nautilus bookmarks and the remaining user defaults. Then verify the system:
margine-validate-margine-system6. Optional: unlock the disk automatically with your TPM2 chip
This section only applies if you ticked disk encryption (LUKS) in step 3. If you did, every boot currently asks for your disk passphrase — the one you chose during installation. You can hand that job to your computer's TPM2 security chip so the disk unlocks automatically on a trusted boot, while keeping your passphrase as a fallback. There's no rush: do it right after first login, or weeks later.
Two different passphrases — don't mix them up.
margine-osis the MOK passphrase (kernel signing, and only on the staged path — see the bottom note). Your disk passphrase is the separate one you set in the installer's encryption box. The TPM2 step here asks for the disk one.
How it stays safe. The TPM only releases the key when the machine boots in the same trusted state (firmware + Secure Boot). If someone disables Secure Boot, moves the disk to another machine, or tampers with the boot chain, the TPM refuses and Margine simply asks for your passphrase instead. Your passphrase is never removed.
The easy way — one command
Margine ships a guided helper that does the whole thing safely and idempotently:
ujust margine-tpm-unlock enableIt auto-detects the encrypted device backing your root, refuses to proceed unless a passphrase/recovery keyslot will survive (so the TPM can never become your only key), asks you to confirm, enrolls the TPM2, then verifies that both the TPM token and your passphrase slot are still present. ujust margine-tpm-unlock status shows the current state; ujust margine-tpm-unlock disable removes the TPM2 key again. Reboot to test.
Remote / SSH: don't rely on an unattended reboot until you've watched the TPM unlock work once with console access. If the TPM doesn't engage (e.g. after a firmware update), boot stops at the passphrase prompt — unreachable over SSH, since the network isn't up that early in boot.
Want to do it by hand, or on a build that predates the helper? The manual steps below are exactly what it automates.
The manual way
Confirm the machine has a usable TPM2:
systemd-cryptenroll --tpm2-device=listIf it lists a device, you're set. (Most machines from ~2016 on have one; if the list is empty, your firmware may call it PTT (Intel) or fTPM (AMD) and need enabling in BIOS/UEFI setup.)
Find your encrypted partition — the row whose FSTYPE is
crypto_LUKS:lsblk -fNote its device path, e.g.
/dev/nvme0n1p3or/dev/sda3.Enroll the TPM2, binding it to the firmware + Secure Boot state. It prompts for your disk passphrase (not
margine-os):sudo systemd-cryptenroll --tpm2-device=auto --tpm2-pcrs=0+7 /dev/nvme0n1p3Replace the device with yours. If you disabled Secure Boot, use
--tpm2-pcrs=0instead (PCR 7 isn't meaningful without Secure Boot).Make the intent explicit and stable across systemd updates: add the TPM2 options to
/etc/crypttab, then regenerate the initramfs.sudoedit /etc/crypttabAppend
,tpm2-device=auto,tpm2-pcrs=0+7to the options on theluks-…line so it reads roughly:luks-<uuid> UUID=<uuid> none discard,x-initrd.attach,tpm2-device=auto,tpm2-pcrs=0+7Then enable local initramfs regeneration (on an atomic system it's off by default, so the stock initramfs ignores your crypttab edit until you do this):
sudo rpm-ostree initramfs --enableThis stages a new deployment.
Reboot. The disk now unlocks automatically — no passphrase prompt.
Step 4 is best practice but not strictly required: Fedora's stock initramfs already carries the TPM2 modules and will auto-unlock straight from the LUKS header. Doing it just makes the PCR policy explicit and predictable across upgrades.
Verify, recover, and undo
Check it worked: after the reboot you weren't asked for a passphrase, and
systemd-cryptenroll --tpm2-device=listshows the enrolled token.Recovery — keep your passphrase. It still works at any time. You'll need it after a BIOS/firmware update or a Secure Boot change: those move the PCR values, so the TPM refuses (by design) and Margine falls back to the passphrase. Type it that once, then re-bind to the new state. Easiest: re-run
ujust margine-tpm-unlock enable— it wipes the stale TPM slot and re-binds in one step. By hand:sudo systemd-cryptenroll --wipe-slot=tpm2 --tpm2-device=auto --tpm2-pcrs=0+7 /dev/nvme0n1p3Undo entirely:
ujust margine-tpm-unlock disable(orsudo systemd-cryptenroll --wipe-slot=tpm2 /dev/nvme0n1p3) removes the TPM2 key and returns you to passphrase-only.
7. Optional: log in automatically
Want the desktop to come straight up after the disk unlocks, with no GDM login screen? Margine has a helper for that too — no need to dig through Settings:
ujust margine-autologin onIt enables GDM autologin for your user (it picks your account automatically, never root), editing /etc/gdm/custom.conf in place with a backup. ujust margine-autologin status shows the current state; ujust margine-autologin off turns it back off. The change takes effect at the next reboot.
Security trade-off. Autologin means anyone who powers on the machine lands in your session — and combined with TPM2 auto-unlock above, the laptop boots all the way to your desktop with no password at all. Convenient on a personal machine you keep with you; think twice on anything that travels or is shared. Your LUKS passphrase still exists as the disk's fallback either way.
When does the margine-os passphrase come up?
The step-2 enrollment above (Enroll key from disk) needs no passphrase. The margine-os passphrase only appears when the system stages the enrollment for you instead of you picking the file — e.g. if you installed with Secure Boot off and re-trigger it later. Then MokManager shows an Enroll MOK entry (not "Enroll key from disk") and asks for the one-time passphrase margine-os (it won't echo as you type, like a sudo prompt). It's a physical-presence gate, not a secret: a remote attacker can't type at the blue screen. We use a short, memorable string — the same reasoning behind Bazzite's ublue-os — because a random passphrase would defeat the point and only confuse first-time users. Once enrolled, every future CachyOS kernel (same key) is trusted automatically; ujust margine-update never brings the blue screen back.
Troubleshooting
- The stick doesn't boot → check the boot menu is using UEFI (not legacy/CSM); the ISO is UEFI-only by design.
bad shim signature/ "Security Violation" with Secure Boot on → expected — enroll Margine's key first (step 2 above). Or temporarily disable Secure Boot for the install and enroll afterwards.- Installed with Secure Boot off, want to enable it now → turn Secure Boot on in firmware, then in a terminal:
sudo mokutil --import /usr/share/cert/MOK.der(set the one-time passphrase tomargine-os) and reboot; MokManager shows Enroll MOK → entermargine-os→ enroll → reboot. - Want to roll back to the previous version → reboot and tap the ↑ / ↓ arrow keys at the GRUB menu (not
Esc) to pick Margine (previous). See Updates & rollback. - Something failed during install → grab a photo/screenshot and the dated ISO identifier (e.g.
margine-live-iso-20260614) and open an issue on margine-image.