Documentation
Gaming on Margine
Margine ships a single image and adds gaming on top via the `ujust margine-gaming` recipe. This page covers what gets installed, how controllers work, and what each of the gaming tools is actually for.
Install the gaming layer — two recipes
Margine ships two recipes; pick by how seriously you game.
Default (Flatpak) — for occasional gamers
One command from a terminal (Ptyxis in the dock), then a reboot:
ujust margine-gaming
systemctl reboot
The recipe prints what it's going to install before doing anything — you can read through and cancel. It installs Steam, Lutris, Heroic, Bottles, Protontricks, ProtonUp-Qt, and RetroArch as Flatpaks (visible in Bazaar) and gamescope + vkBasalt as system packages, then asks you to restart so the system packages activate.
Sandboxed = fully removable with ujust margine-gaming-remove. Every system update takes ~30 s longer because Margine re-applies the layer. Not a deal-breaker.
Native (RPM-layered) — for daily / serious gamers
If you run anti-cheat titles (EAC, BattlEye), VR, Steam Link, or NVIDIA proprietary + Mesa-git side-by-side, the Flatpak runtime's frozen Mesa and sandbox restrictions get in the way. The native variant installs Steam, Lutris, RetroArch as native RPMs from RPM Fusion — full Proton/ Wine compatibility, MangoHud/GameMode integration works out of the box, the Mesa driver always matches your system.
ujust margine-gaming-native
systemctl reboot
The launchers without an official RPM (Heroic, Bottles, Protontricks, ProtonPlus) stay as Flatpaks. Rollback: ujust margine-gaming-native-remove. Cost relative to the Flatpak variant: every update takes 60-90 s extra (vs ~30 s) because the layered set is larger; occasional risk of file conflicts if upstream relocates a file in steam/lutris RPMs. (Update a layered system the normal way — the daily auto-update or ujust margine-update; both re-apply the layer. A raw sudo bootc upgrade refuses a layered deployment.)
Pick the Flatpak default if you game occasionally. Pick native if you game daily.
Quick start: from install to a game running
Installed a gaming layer above and rebooted? This is the whole loop, GUI-only, first step to last. Each step links to the fuller section below if you want the why — but you can follow just the seven steps and be playing.
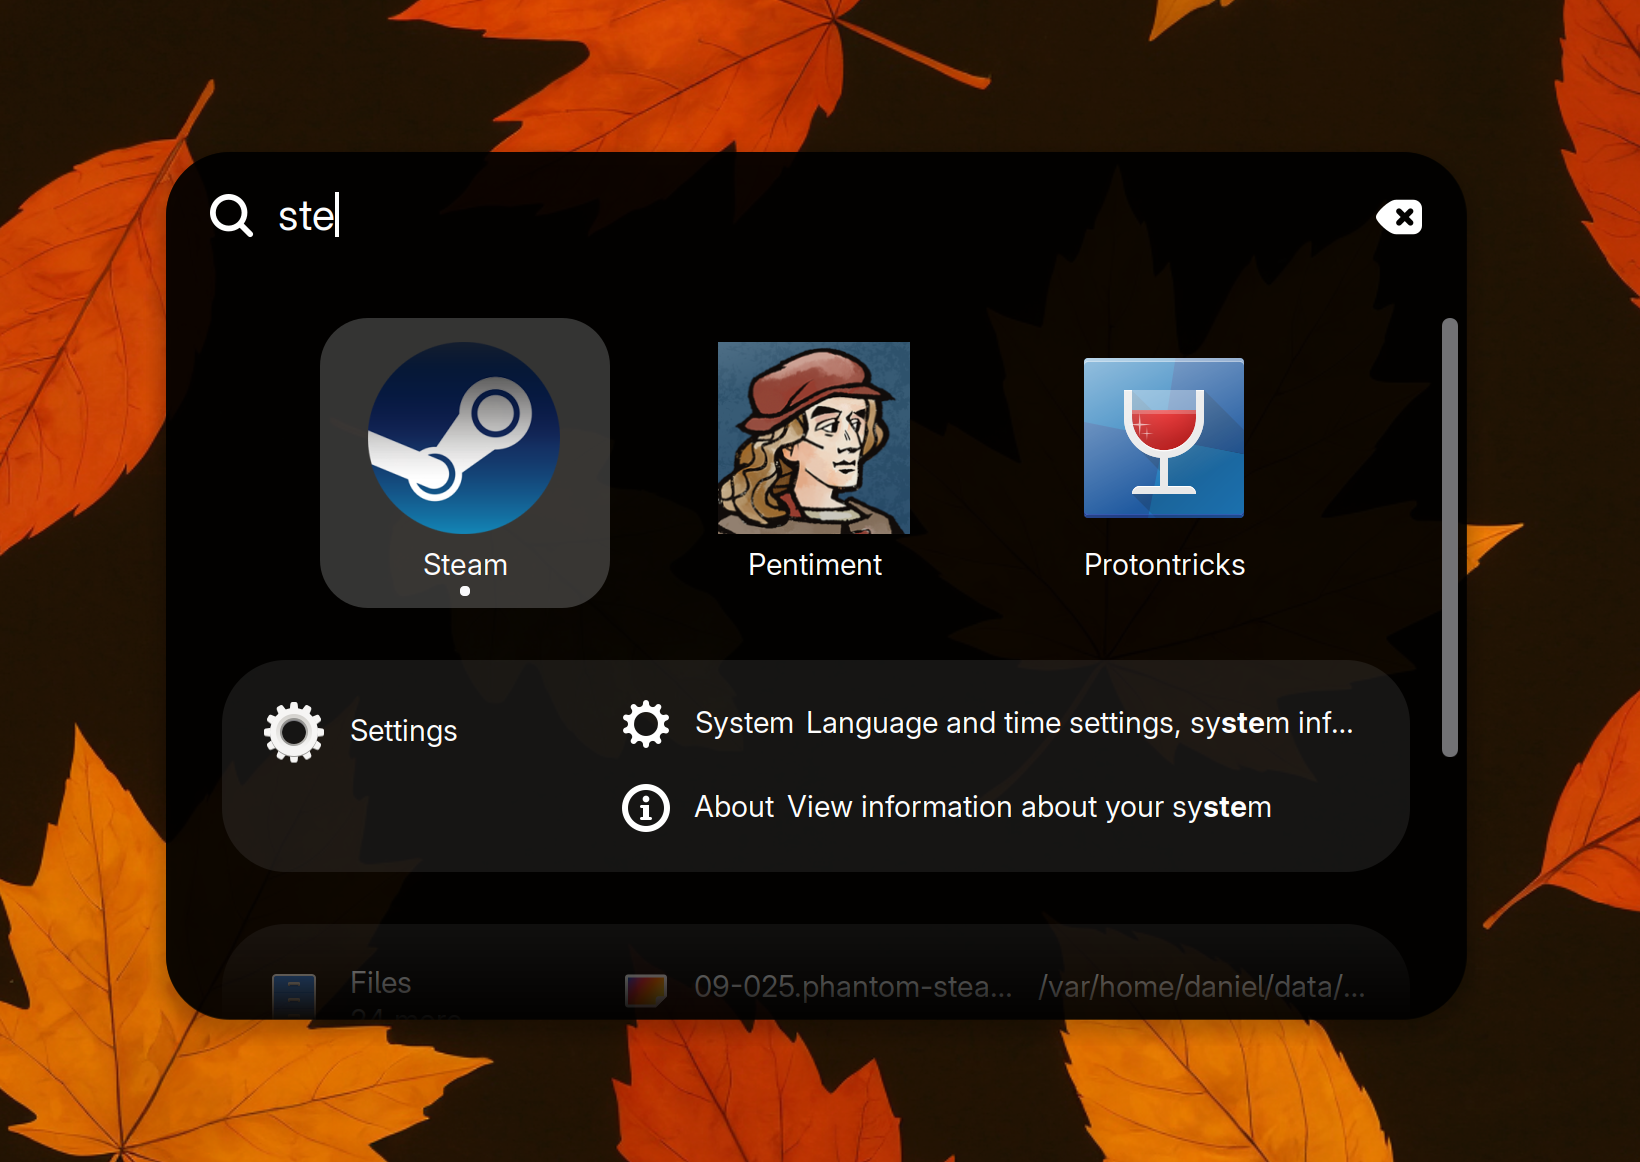
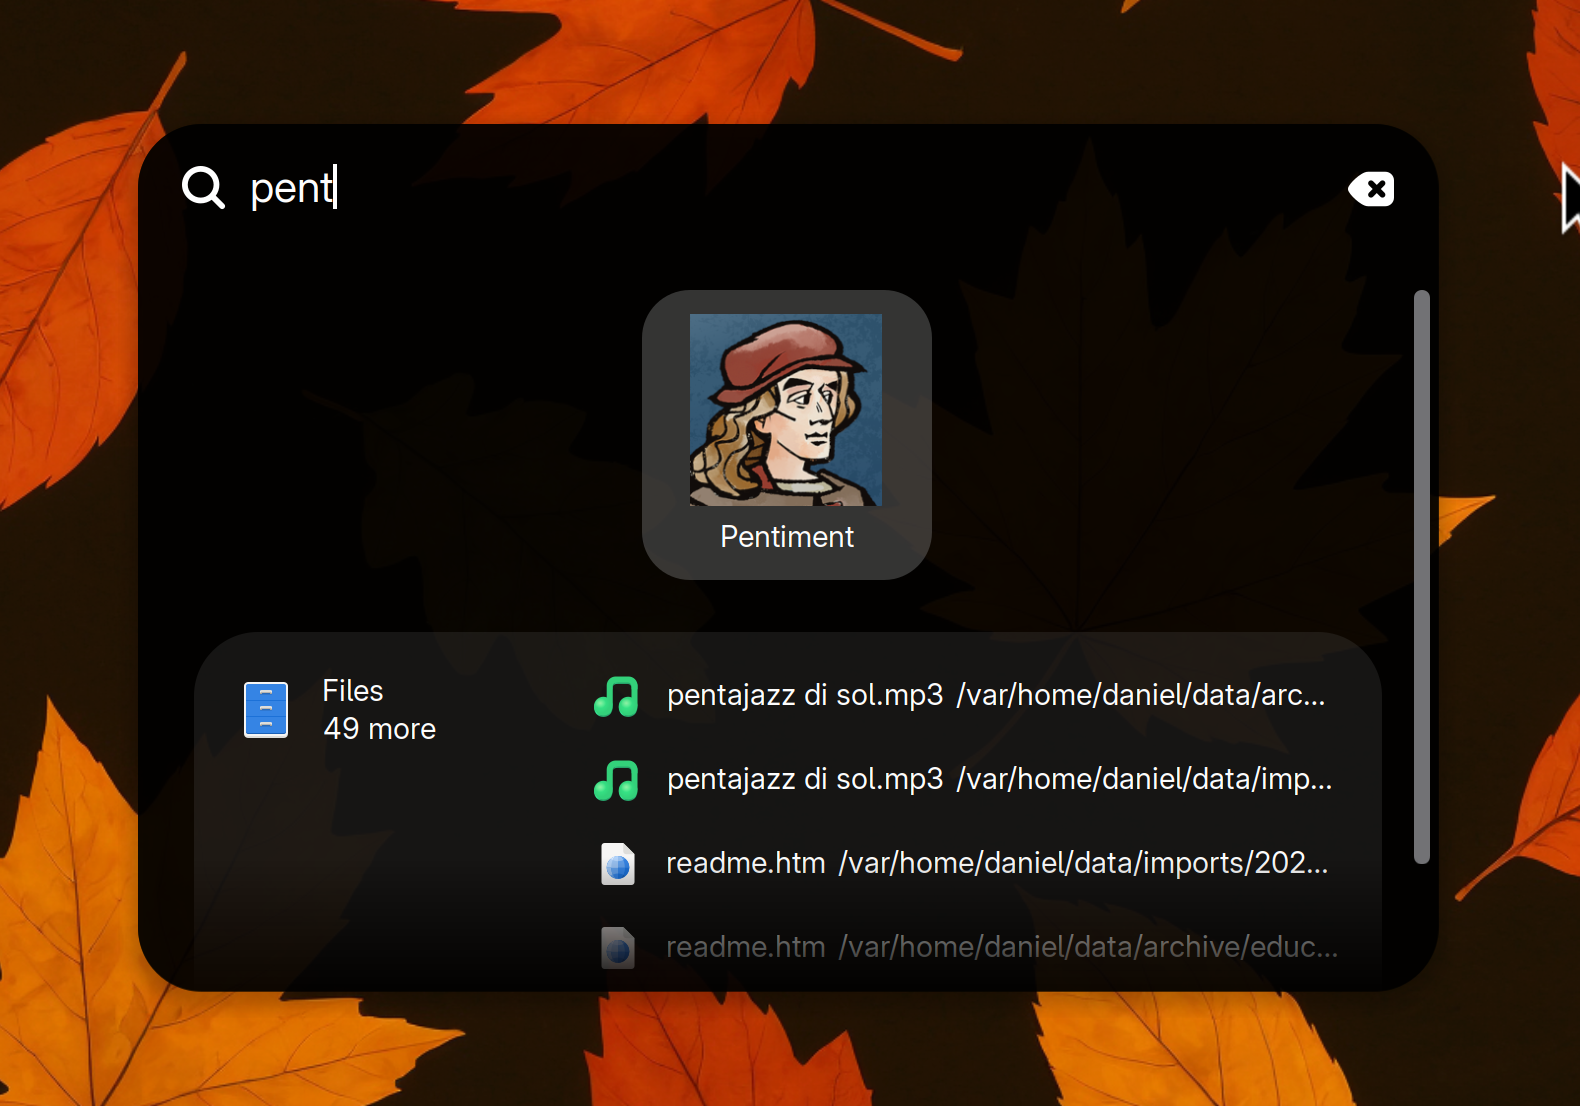
1. Open Steam. Press Super, type steam, hit Enter (or click it in the dock). Log in and let it self-update once.
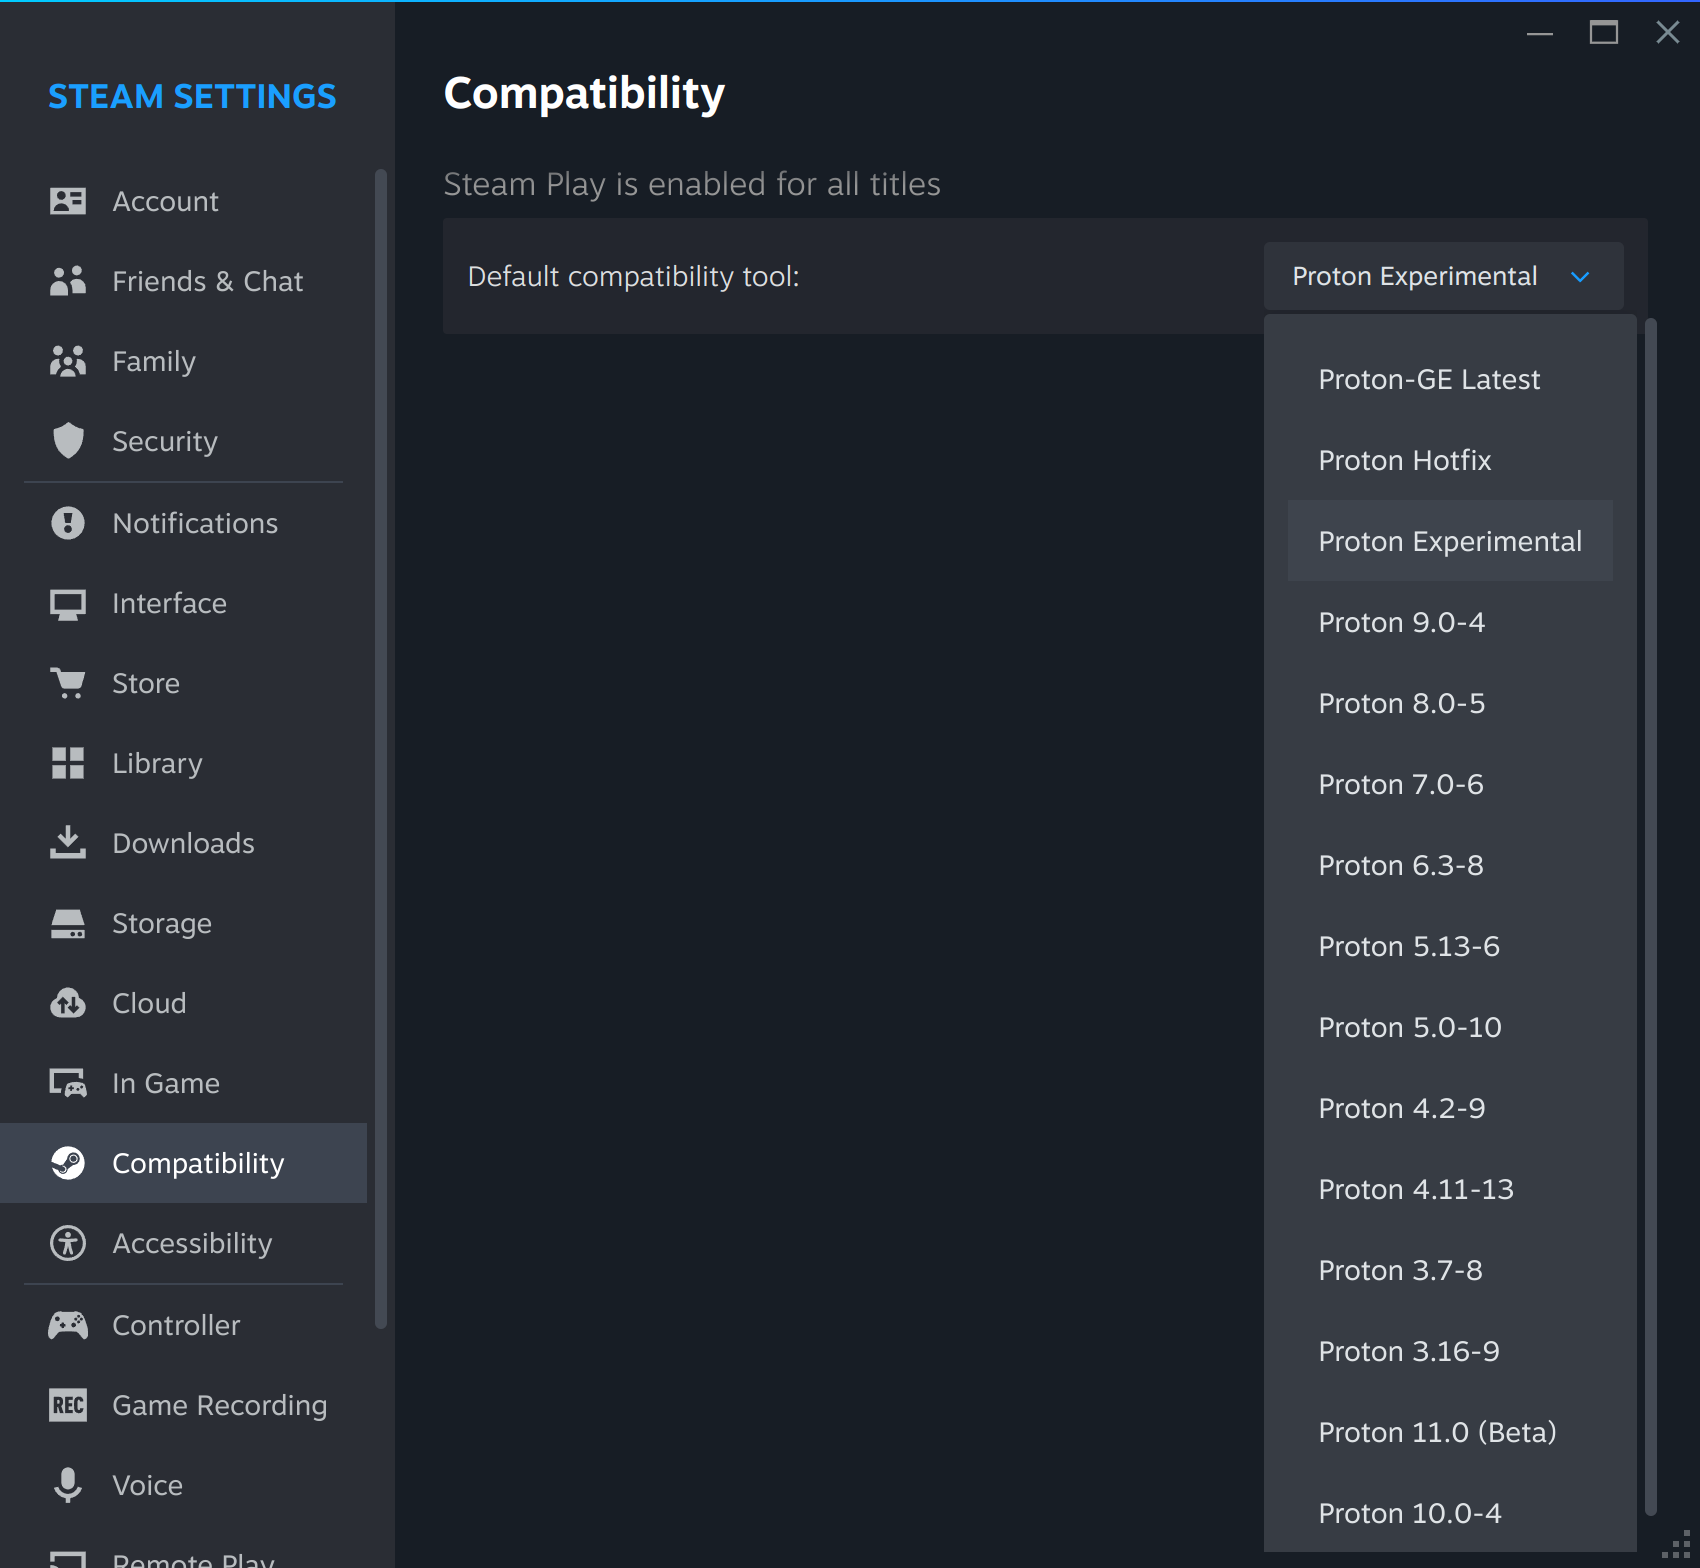
2. Set your default Proton. Steam → Settings (cog, top-right) → Compatibility. "Steam Play is enabled for all titles" is already on — just open the Default compatibility tool dropdown and choose the latest numbered Proton (the highest version in the list, e.g. Proton 10). That's the best-tested default for most games. Proton Experimental is a bleeding-edge staging branch and GE-Proton is a community build — reach for either only when a specific game needs it (see steps 4–5). See Set your default Proton (Steam Play) below.
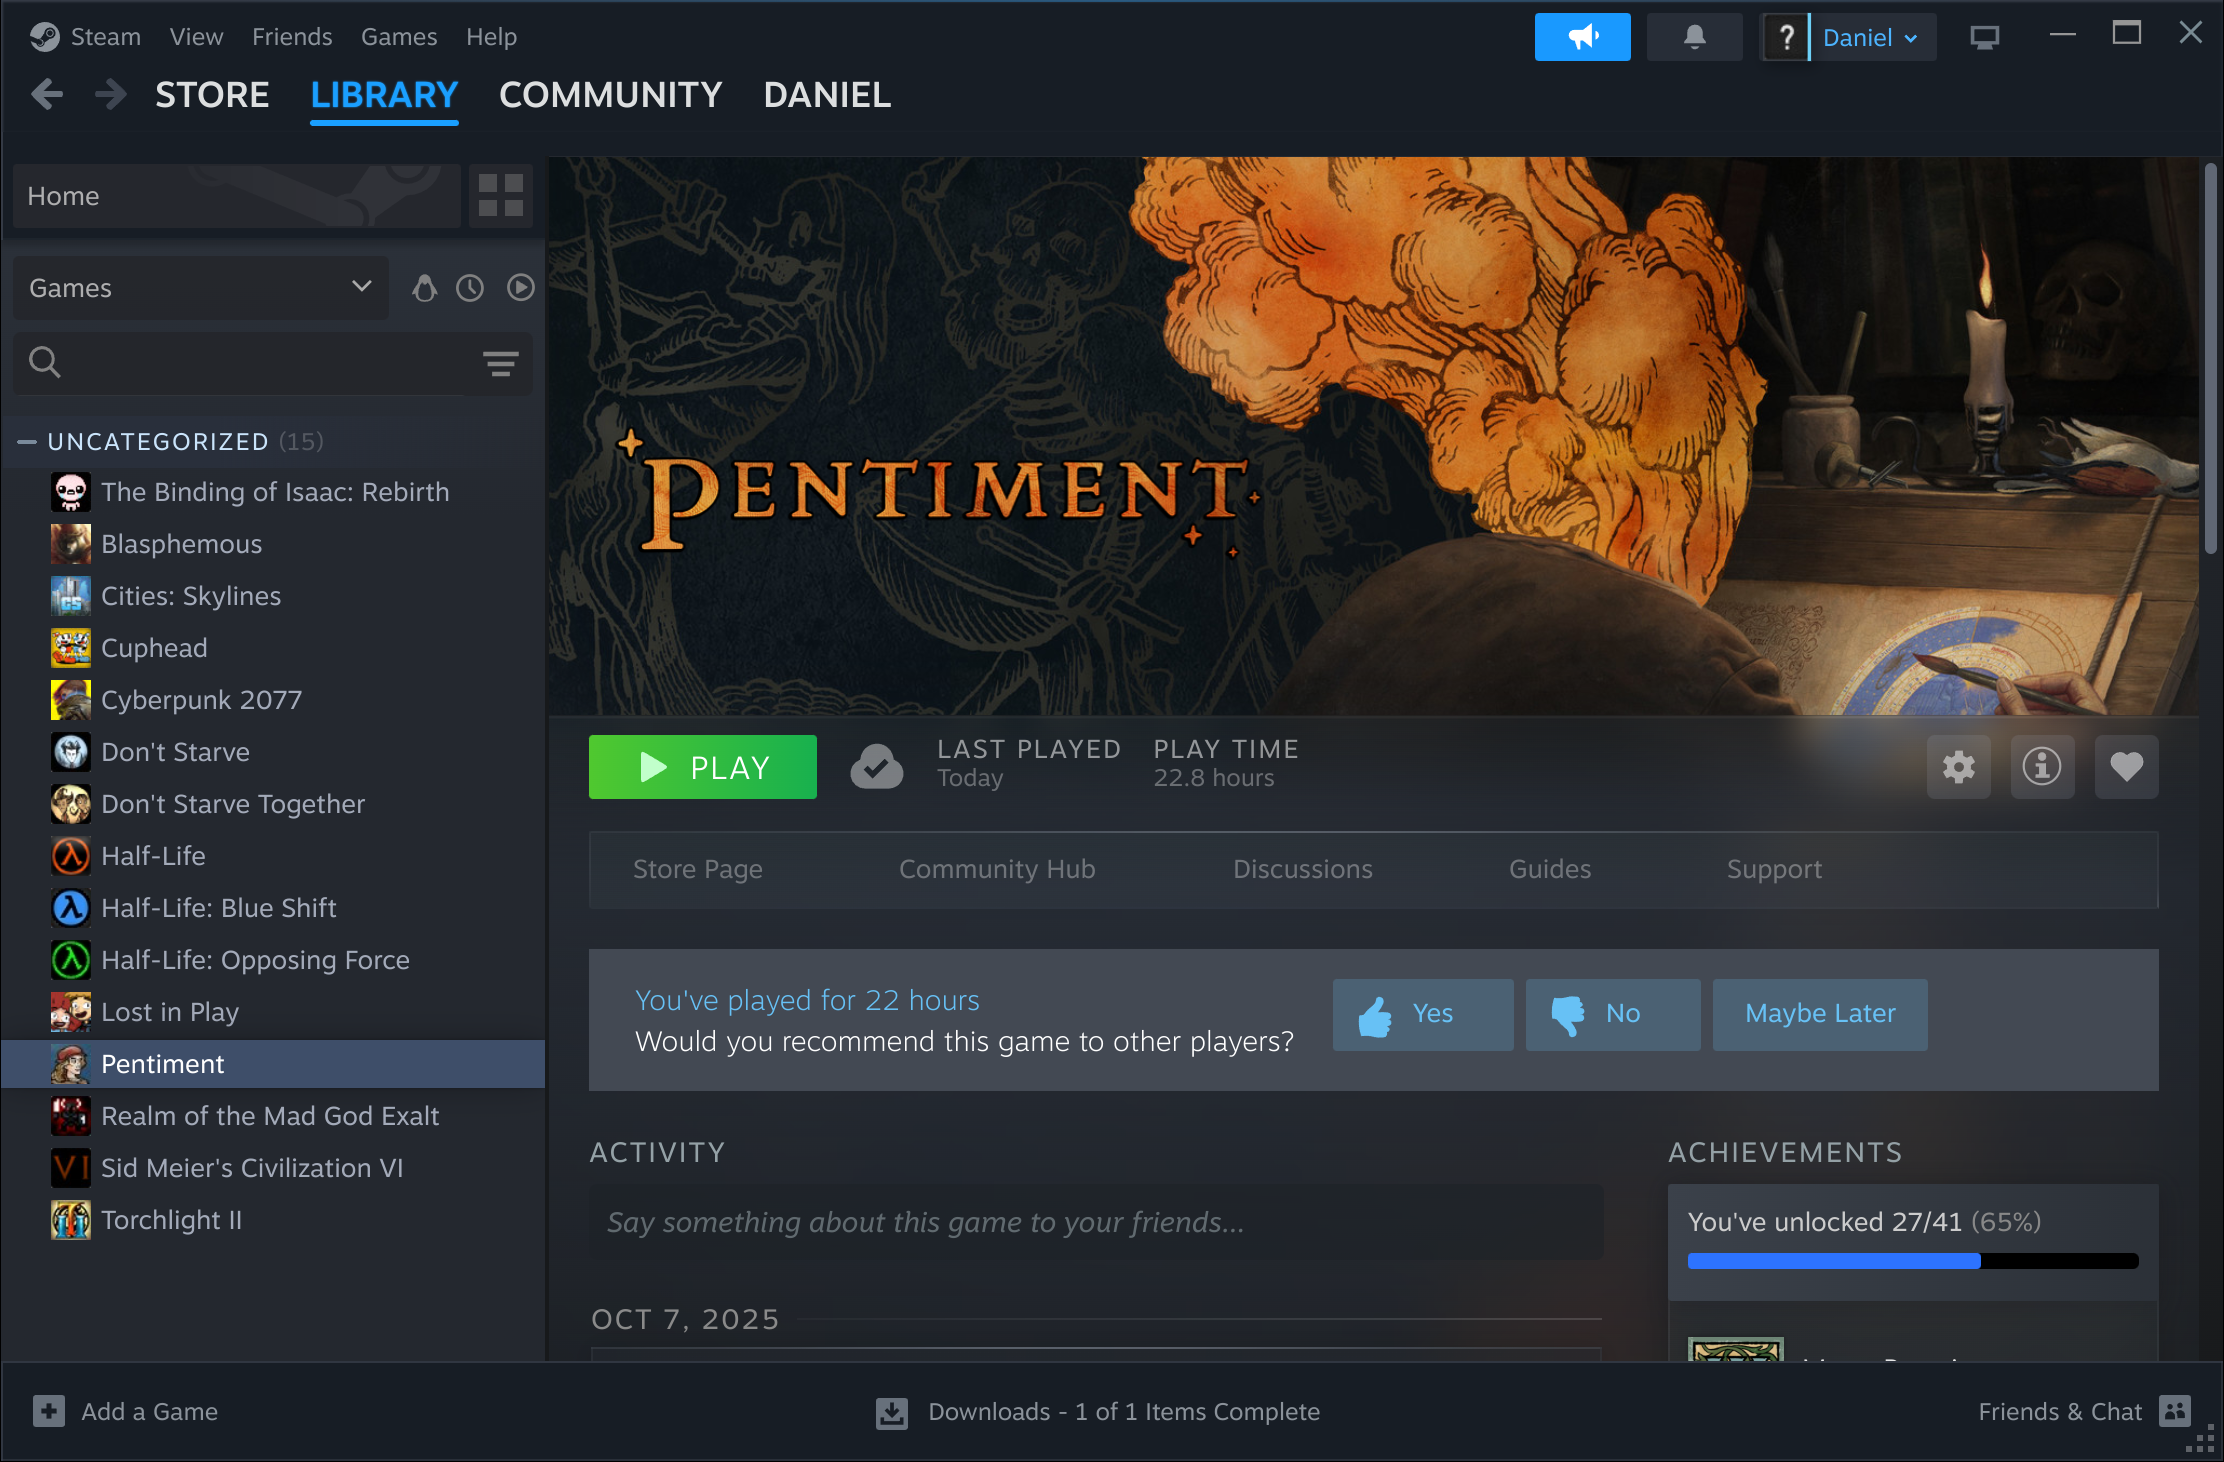
3. Open your game in the Library. Click LIBRARY in the top bar and select the game.
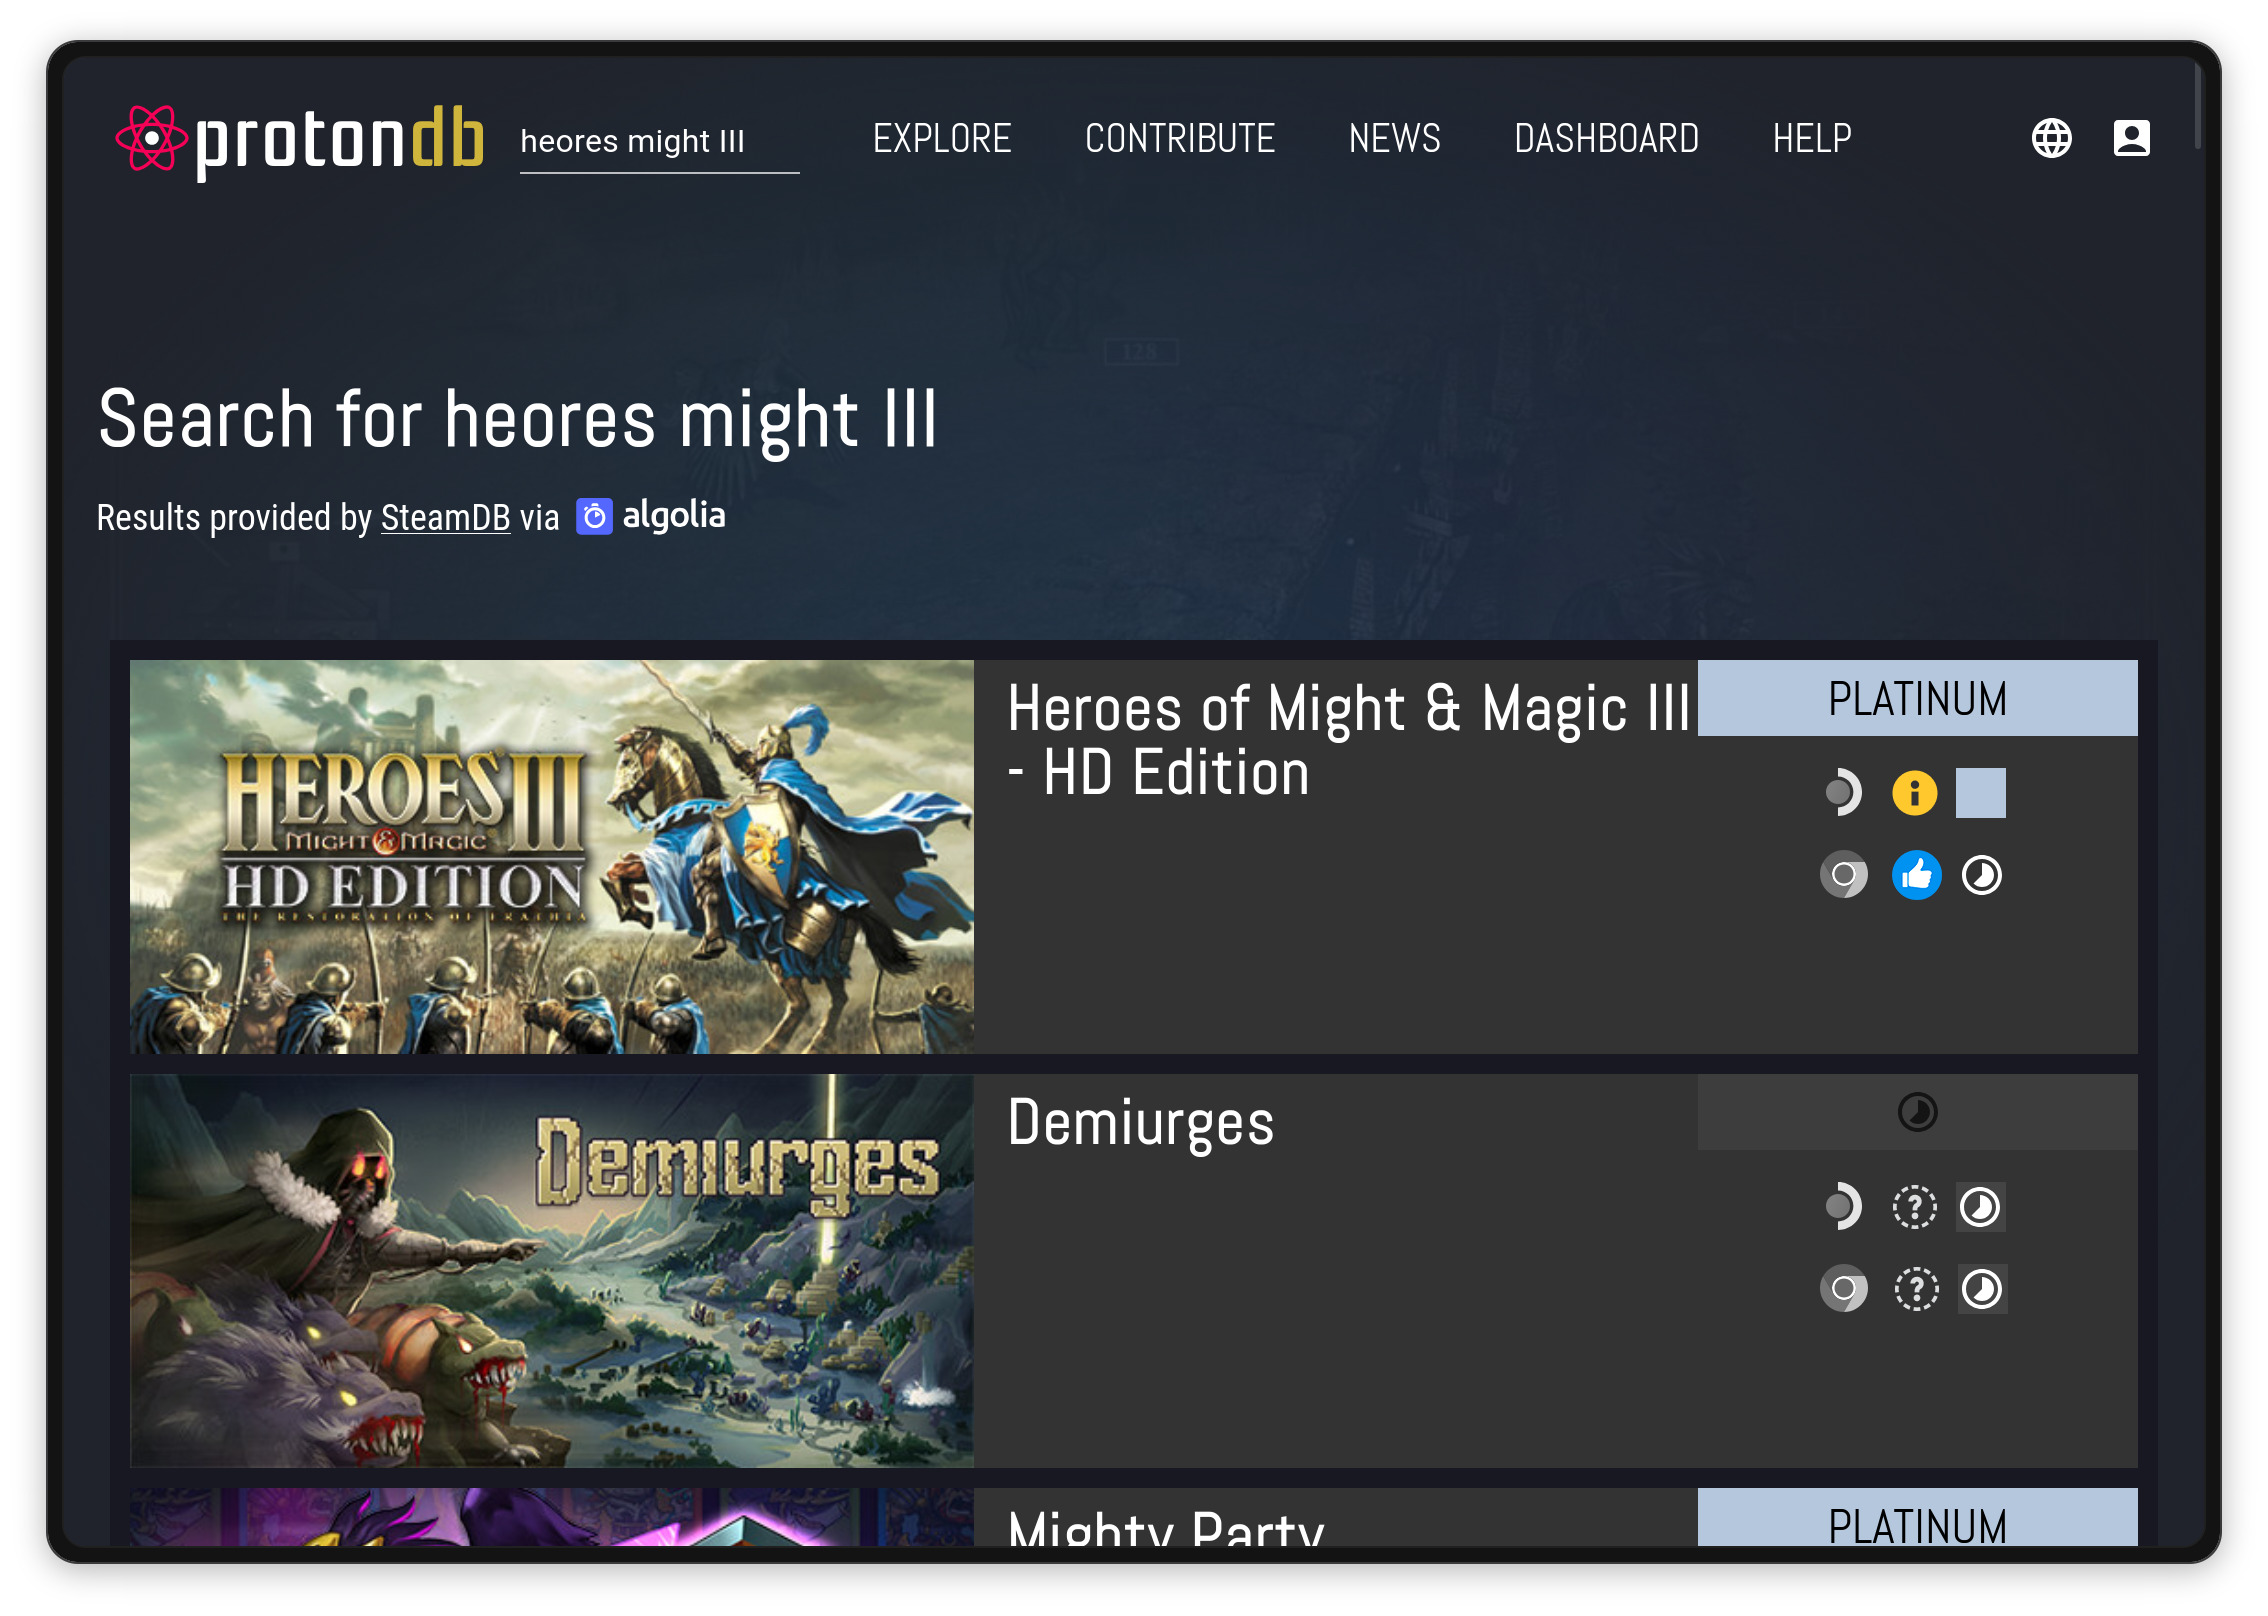
4. Check it'll run — ProtonDB. Before the first launch, look the game up on protondb.com and read its medal plus the recent reports. Platinum / Gold means go. Reports often tell you exactly which Proton to use. See Will a game run? below.
5. Only if a report says "use GE" — give that game Proton-GE. Install Proton-GE once with ProtonPlus (the Flatpak manager), then assign it to the game in ProtonPlus's Games tab: set its Compatibility tool to Proton-GE Latest. Quit Steam completely first — ProtonPlus shows that reminder at the bottom, because the change is only written once Steam is closed. See ProtonPlus below.
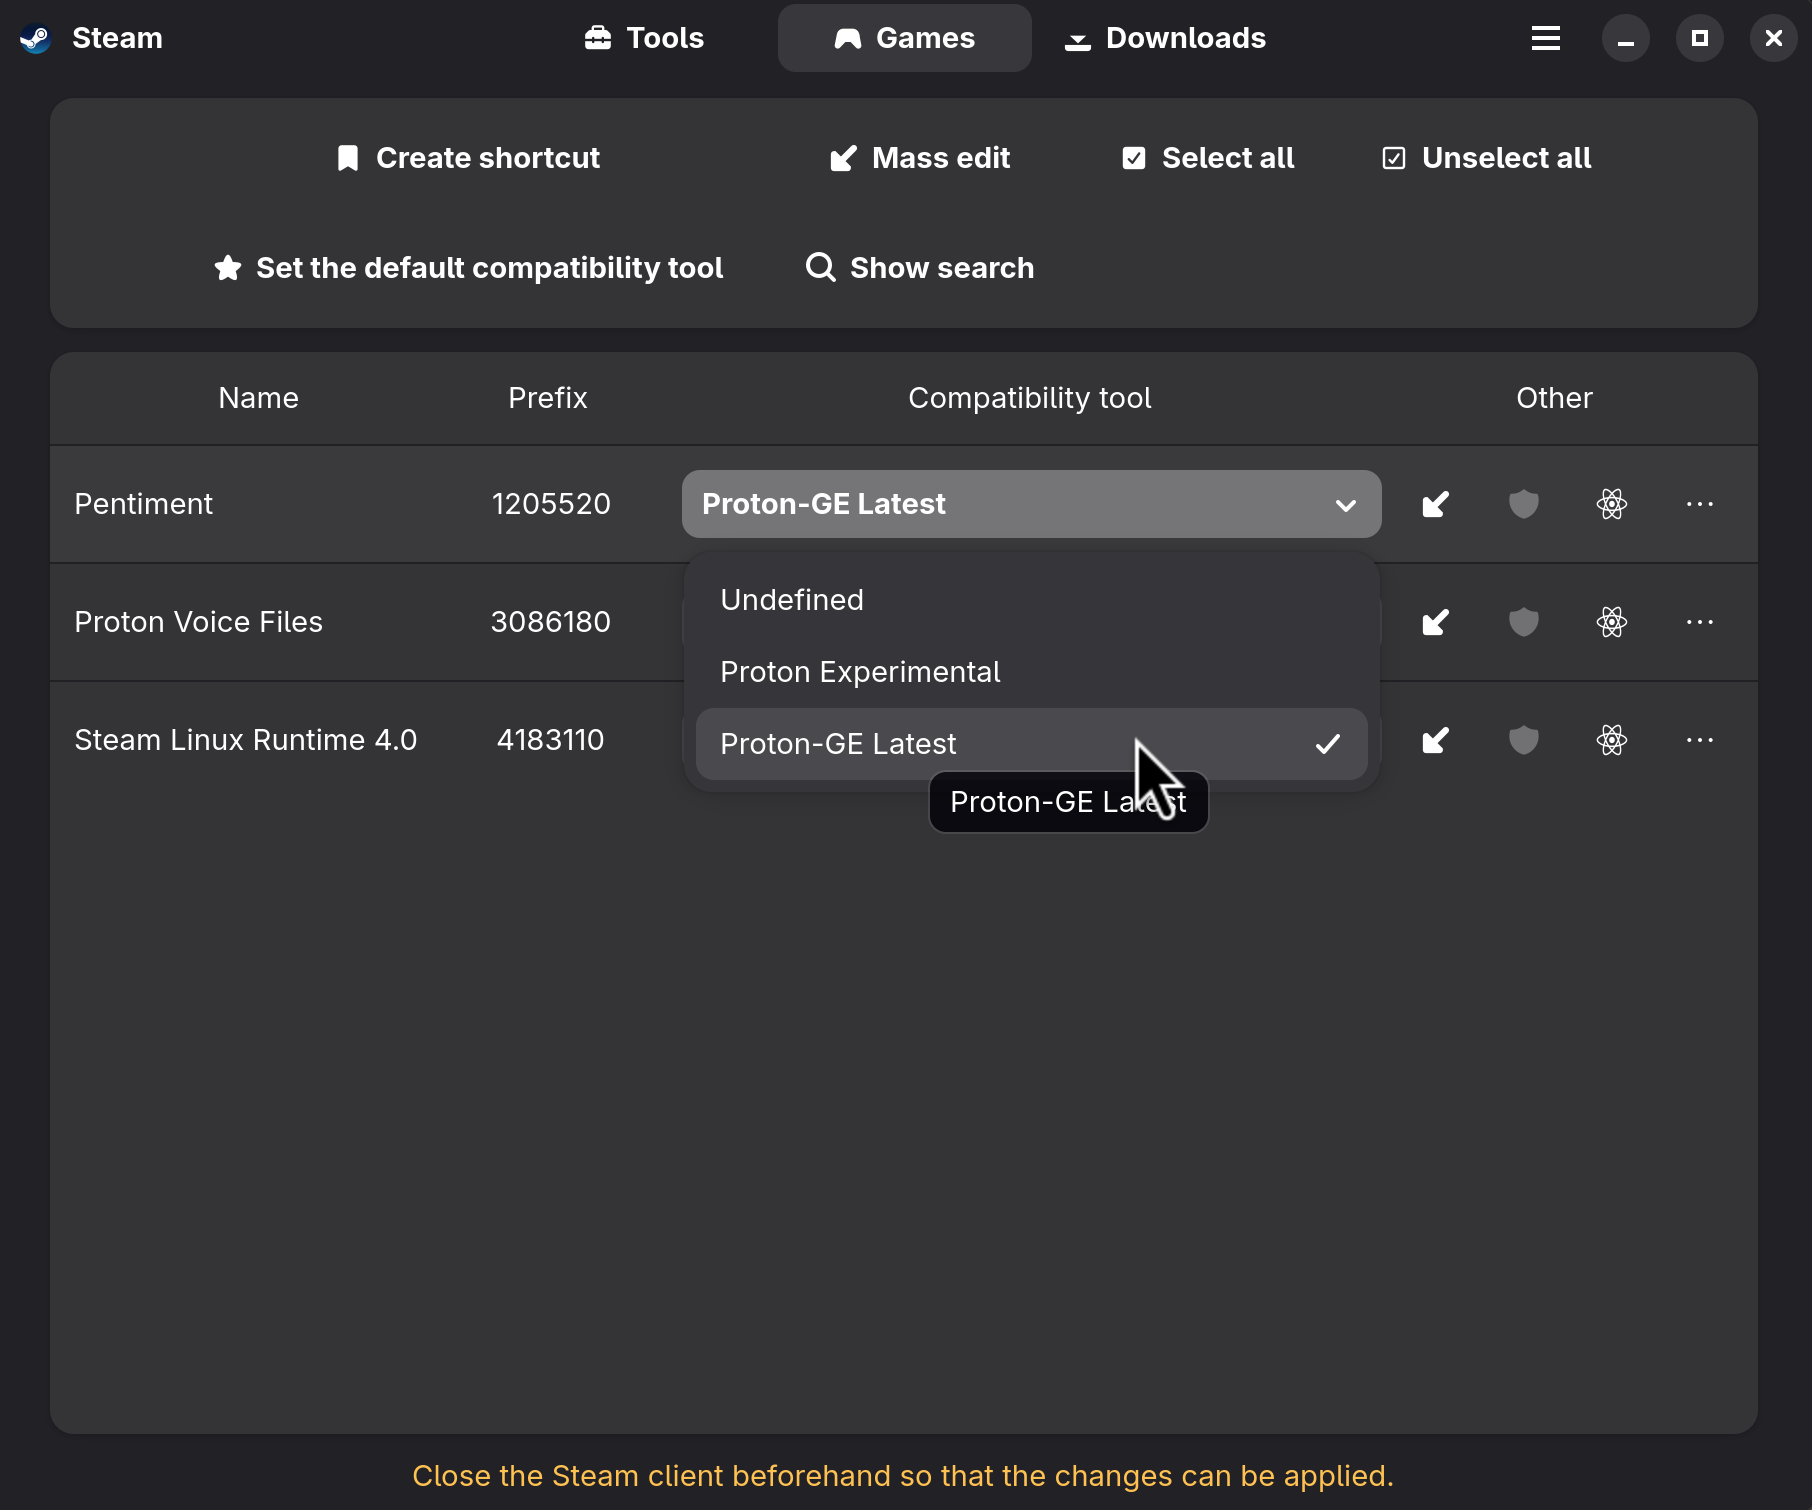
Prefer to stay inside Steam? Same result: right-click the game → Properties → Compatibility → Force a specific tool → GE-Proton.
6. Switch to the gaming CPU scheduler (one-time). Margine runs a signed CachyOS/BORE kernel with pluggable sched_ext schedulers. For games — especially with things running in the background — open Margine CPU Scheduler (press Super, type "scheduler") and pick scx_lavd, the low-latency, gaming-tuned one. It applies live (no reboot) and persists across reboots; switch back to the default any time from the same app. Prefer the terminal? ujust margine-scheduler lavd. See CPU schedulers.

7. Play. Back in Steam, press Play. The first launch does a one-time shader pre-compile — that's normal, not a hang. (If you've added a desktop shortcut for the game — right-click it in the Library → Manage → Add desktop shortcut — you can also launch it straight from the Super search.)
That's the recommended path. The rest of this page is the detail behind each step.
Controllers
steam-devices ships the udev rules for Xbox / PlayStation / Steam Controller / 8BitDo / Switch Pro controller / generic XInput / etc. — they're picked up automatically when plugged in or paired over Bluetooth. No setup needed in 95 % of cases.
Need to remap a button, swap stick axes, or fix a quirky generic controller? input-remapper (preinstalled, find it in Activities) is a graphical mapper: pick the device, hit "Record", press the physical button, type what it should send. Saves a profile per device that loads automatically next time you plug it in.
The gaming toolbox in one paragraph each
Margine Gaming ships a stack of small tools that each solve a specific problem. They don't run all the time — you opt in per game via Steam launch options, or by opening a GUI configurator. None of these change anything until you ask them to.
MangoHud — the on-screen performance overlay
Adds an unobtrusive FPS / GPU / CPU / VRAM / temperature HUD on top of any Vulkan or OpenGL game. Useful to spot a CPU bottleneck, watch frame time consistency, or just confirm a game is hitting the framerate cap. Toggle the overlay on-the-fly with Shift + F12. Configure visually via goverlay (next entry) — no config files to edit by hand.
MANGOHUD=1 %command%goverlay — the GUI for MangoHud + vkBasalt
Single window that lets you toggle every MangoHud metric (FPS, frame time graph, temps, fan RPM, throttling state, …), pick a position and font size, and preview the result live. The same GUI also configures vkBasalt shaders. Open it from Activities; close when you're done. Writes a tiny ~/.config/MangoHud/MangoHud.conf behind the scenes that survives reboots.
GameMode — automatic performance tuning while gaming
Steam knows when a game starts. When it does, GameMode switches the CPU governor to performance, bumps the game process priority, and applies a few I/O tweaks — then puts everything back when the game exits. No setup needed: Steam's Flatpak integration auto-enables it. You can verify by running gamemoded -s in a terminal while a game's running ("gamemode is active" → working).
Want it for non-Steam games? Add this to the Steam launch options (or just to the command line):
gamemoderun %command%gamescope — game-in-a-window compositor (HDR, scaling, frame cap)
Wraps a game in its own micro-compositor that you can control independently of GNOME. The headline features:
- Per-game framerate cap — useful for a noisy fan on a laptop or a 60 Hz cap on a 144 Hz monitor when you don't want a game to push the GPU.
- Per-game resolution scaling (FSR) — render at e.g. 1080p and upscale to 4K with AMD's FidelityFX Super Resolution. Looks remarkably good and halves the GPU load.
- HDR passthrough on monitors that support it (AMD only today; NVIDIA HDR is in flight upstream).
- Frame pacing for games that have stutter under GNOME's compositor.
# Plain wrap (game runs at its own resolution inside a borderless window)
gamescope -- %command%

# Cap at 60 fps, 1080p internal, upscale to 4K with FSR
gamescope -W 3840 -H 2160 -w 1920 -h 1080 -F fsr -r 60 -- %command%
vkBasalt — post-processing shaders (sharpening, CAS, FXAA, SMAA)
Sits between the game and your screen and applies image- processing shaders to the final frame. The most useful preset is CAS (Contrast-Adaptive Sharpening) — makes blurry games (especially older or TAA-heavy ones) look noticeably crisper with almost no performance cost. Configure visually via goverlay; activate per-game with:
ENABLE_VKBASALT=1 %command%input-remapper — fix or rebind controller / keyboard buttons
Already covered above for controllers. The same tool also remaps keyboard keys, mouse buttons, and tablet pens. The usual use cases: turn an unused F-key into a push-to-talk button, swap left/right Ctrl, give a side-button on a mouse a custom action. Profiles are per-device and load automatically.
tuned — system-wide performance profile
Sets the overall power/performance balance for the machine (different from GameMode, which only kicks in per game). GNOME's Power panel shows the current profile — "Balanced", "Performance", or "Power Saver" — and tuned- ppd translates those into the right CPU governor, fan curve, and platform tweaks. On a laptop you usually want "Balanced" on battery and "Performance" when plugged in for long sessions. On a desktop just leave it on "Performance".
tuned-adm active                # what profile is on now
tuned-adm profile throughput-performance   # set explicitly
tuned-adm recommend             # ask tuned to pick the best one for the hardware
tuned sets the power policy; the CPU scheduler decides which task runs on which core. For gaming under background load, try scx_lavd — see CPU schedulers.
Steam launch options — a few recipes
All of the snippets above go in the same place: right- click a game in your Steam library → Properties → Launch Options. Multiple environment variables on one line are fine. %command% is the placeholder for the game executable and must be present.
# Show MangoHud overlay only
MANGOHUD=1 %command%

# Wrap with gamescope, 60 fps cap, FSR upscale, force-windowed
gamescope -W 3840 -H 2160 -w 1920 -h 1080 -F fsr -r 60 -f -- %command%

# MangoHud + vkBasalt (sharpening) + GameMode all at once
MANGOHUD=1 ENABLE_VKBASALT=1 gamemoderun %command%

# Force-disable Steam Deck mode in a desktop install of a Steam Deck game
SteamDeck=0 %command%

# Enable Proton's experimental NVIDIA DLSS-to-FSR translation
PROTON_ENABLE_NGX_UPDATER=1 %command%
More patterns + every supported variable are documented in Bazzite's launch-options reference — it applies almost verbatim to Margine — same Proton, same gamescope.
Your first run with Steam on Linux
You're on native Steam (the ujust margine-gaming-native path), so the client talks straight to the system Mesa/Vulkan stack and to the host MangoHud/gamescope/GameMode binaries — no Flatpak sandbox in between. Practically, that means everything in the toolbox above "just works" in launch options.
Log in, let Steam self-update once, and install a game. Press Play — that's it. A Windows-only game runs through Proton (Valve's compatibility layer: Wine + DXVK/VKD3D translating Direct3D to Vulkan) transparently; you usually can't tell. A few things that are normal and not errors:
- A one-time shader pre-compile the first time you launch a game (precompiles GPU shaders to cut in-game stutter on RADV — leave Settings → Downloads → Enable Shader Pre-Caching on).
- Per-game settings live under right-click game → Properties (Launch Options, Compatibility, Updates, Betas).
- Big Picture Mode (cog → Big Picture) is the couch/controller UI — the same one the Steam Deck uses.
- Install games to your data partition, not the OS — Margine remaps home/XDG, so add a library under
~/dataor a dedicated drive in Settings → Storage.
Set your default Proton (Steam Play)
This is the one setting that matters most, and it's all in the GUI: Steam → Settings (the cog, top-right) → Compatibility.
On Margine's current Steam you'll see "Steam Play is enabled for all titles" already on — there's nothing to tick. The only choice is the Default compatibility tool dropdown:
Open the dropdown and pick the latest numbered Proton (the highest non-beta version, e.g. Proton 10). Valve verifies games against the numbered releases, so it is the best-tested default. The list also has Proton Experimental (a rolling staging branch — newest fixes first, but it can introduce regressions and may want newer GPU drivers), Proton Hotfix, older numbered builds down to legacy versions, and — once you install it through ProtonPlus and restart Steam — GE-Proton. Keep the numbered build as your default and switch a specific game to Experimental or GE only when ProtonDB says it needs one. Restart Steam if it prompts.
Native Linux games keep running natively; only Windows titles go through Proton.
To override it for a single game (also pure GUI): right-click the game → Properties → Compatibility → tick "Force the use of a specific Steam Play compatibility tool", then choose a Proton / GE-Proton from the dropdown. That's where you apply Proton-GE to individual problem games.
Older Steam builds showed this differently — two checkboxes ("Enable Steam Play for supported titles" / "…for all other titles") plus a "Run other titles with" dropdown. If you ever see that layout, tick both boxes and pick a Proton. Current Steam (yours) simplifies it to the single "enabled for all titles" line + the Default-tool dropdown above.
Will a game run? Reading ProtonDB and Deck badges
Three signals; use them together.
ProtonDB is the community source of truth — a crowd-sourced medal per game:
| Medal | Meaning |
|---|---|
| Platinum | Perfect out of the box, no tweaks |
| Gold | Perfect after a small tweak (a launch option or specific Proton) |
| Silver | Playable with minor issues |
| Bronze | Runs but crashes / significant problems |
| Borked | Won't start / unplayable (almost always anti-cheat) |
Read the recent top reports, not just the medal — each lists the reporter's Proton version, distro, and GPU, plus the exact fix (a launch option, a protontricks verb, "use GE"). A two-year-old Bronze on old Proton is often Platinum today on Proton-GE. Weight reports from desktop-Linux users on the same GPU vendor and driver as yours (AMD/RADV, NVIDIA, or Intel/ANV) — they match your setup most closely.
Steam Deck badges show inside the client (store-page "Steam Deck Compatibility" box, or hover a Library thumbnail): Verified, Playable, Unsupported, Unknown. They're tuned to Deck hardware, so on your desktop read them loosely: Verified/Playable is a strong "Proton works" signal (your desktop or laptop runs the same Proton stack and is usually more capable than a Deck). Ignore Deck-only demerits like "small text" or "needs an on-screen keyboard" — irrelevant with a monitor and keyboard. The one Deck reason that does carry over is anti-cheat: "Unsupported" is most often anti-cheat, and that blocks your desktop too.
Native vs Proton: a SteamOS/Linux icon on the store page means a native build exists. With Steam Play on, a Windows-only listing is fine — and forcing a buggy native game through Proton is common and supported.
For online/competitive games, check areweanticheatyet.com first (Supported / Running / Planned / Broken / Denied). EAC and BattlEye both ship Linux runtimes, but each developer must opt in per game — roughly half of anti-cheat titles work. Riot Vanguard never works on Linux; EA's kernel anti-cheat currently blocks it too (EA said in 2026 it's working on Proton support, but as of now its competitive titles don't run). This is exactly why Margine installs Steam as a native RPM rather than a Flatpak: anti-cheat expects Valve's per-game container runtime and the host glibc/namespaces, and the Flatpak client's own sandbox collides with that. Keep Steam native — don't switch the client to Flatpak. (The tools being Flatpak is fine; see below.)
Those auto-downloading runtimes — let them install
The first time you enable Steam Play or launch a game, the Downloads queue fills with items that look like bloat but aren't. Let every one finish; don't cancel them — they're on-demand dependencies, cached once and reused by every game.
- Steam Linux Runtime 4.0 ("medic") — the newest container (Debian 13 base), where current Proton (11+) and native games run inside for a consistent library set regardless of distro. The main one now.
- Steam Linux Runtime 3.0 ("sniper") — the previous container (runs Proton 8–10); may also appear depending on which Proton a given game uses.
- Steam Linux Runtime 1.0 ("scout") — the oldest runtime, still needed by some vintage native Linux games.
- Proton Experimental — Valve's rolling staging branch: newest fixes first, but it can regress. Reach for it per-game when a brand-new title needs the latest fixes — not as your default.
- Steamworks Common Redistributables — shared VC++/DirectX/.NET/PhysX installers; skipping these makes games fail to start.
- Proton Voice Files — small voice/TTS support bits.
Cancelling one just makes a game re-trigger the download at launch with a cryptic error. If a download stalls, restart Steam and it resumes.
Check Steam sees your GPU (and the one-command health check)
The GUI way — no terminal. In Steam open Help → System Information and scroll to the graphics section. You want your real GPU and driver listed — for example an AMD Radeon on RADV / Mesa, an NVIDIA card on its proprietary driver, or Intel on ANV — and a Vulkan version of 1.3 or newer. If you instead see llvmpipe, the GPU isn't being used — that's the one thing worth fixing. A live MangoHud overlay in any game (see the toolbox above) is the other quick "yes, it's GPU-accelerated" confirmation.
One-shot health check. Margine ships a validator with a friendly entry point — one command:
ujust margine-doctorIt runs every Margine check with a one-line PASS/FAIL each, gaming included. The gaming check fails on the one state that actually matters — Steam installed but Vulkan dead — and otherwise just reports your tools, controllers, Vulkan device and split-lock policy. (Under the hood it's margine-validate-gaming-runtime; for a manual deep look: vulkaninfo --summary lists the RADV device, vkcube draws a spinning cube if Vulkan works.)
One expected line: the validator prints "missing command: vkbasalt". That's normal — vkBasalt is a Vulkan layer, not a program; you turn it on with
ENABLE_VKBASALT=1, never a command.
ProtonPlus — managing extra Proton builds
ProtonPlus (com.vysp3r.ProtonPlus) is not a Proton build — it's a GUI manager that downloads, updates, and removes compatibility tools (Proton-GE, Proton-CachyOS, the non-Proton tools, DXVK/VKD3D libs) and drops them where Steam looks for them. Yes, it ships as a Flatpak, and that's correct and intended — there is no native RPM, and this is how every atomic gaming distro does it. Its Flatpak ships with host filesystem access by default (the upstream Flathub manifest), so it writes into native Steam's ~/.steam/root/compatibilitytools.d (currently empty, ready to fill) with nothing to configure.
To install and use a build:
- Open ProtonPlus, select Steam as the target launcher at the top.
- Click +, pick a build (e.g. Proton-GE → latest), Install.
- Fully restart Steam (quit completely, not just the window) so it rescans
compatibilitytools.d. - Apply it: right-click game → Properties → Compatibility → Force a specific tool → GE-Proton, or set it globally under Settings → Compatibility → "Run other titles with:".
If a freshly installed build doesn't appear in the dropdown, you forgot to restart Steam — that's the number-one gotcha.
The Proton variants, and which to pick
| Build | What it is | When to use |
|---|---|---|
| Valve Proton (stable) | The official, heavily tested numbered branch that ships with Steam | The default for most games; anything Deck Verified or ProtonDB Platinum/Gold |
| Proton Experimental | Valve's rolling staging branch (auto-downloaded) | Brand-new releases, or a game broken on stable. Try this first — zero install |
| Proton-GE | Glorious Eggroll's community fork: latest Proton + media-foundation codecs, FSR, NVAPI/DLSS bits, a big per-game protonfixes database | The recommended "fixes everything" runner. Use when stable fails, cutscenes are black, or ProtonDB says "use GE" |
| Proton-CachyOS | Performance-tuned Proton in CPU-microarch tiers | Optional; chasing a bit more performance. See the CPU caveat below |
| Proton-EM | Dev-oriented fork strong on FSR4 and wine-wayland/HDR | Only if you specifically want FSR4 / native Wayland and like to tinker |
| DW-Proton / Proton-Tkg / Proton-GE RTSP | Other community spins (Tkg = custom-compiled; GE-RTSP = Proton-GE plus RTSP codecs, mainly for VRChat camera streams) | Only when a specific game/community thread names one |
| Luxtorpeda / Roberta / Boxtron | Not Proton — Steam Play tools that run native engines: open-source game engines / ScummVM (classic adventures) / DOSBox (DOS games) | Per-game, only for the genre each targets |
| Steam Tinker Launch | Not a runtime — a per-game menu to bolt on MangoHud/gamescope/GameMode/vkBasalt and swap Proton without editing launch options | A graphical per-game control panel; power-user convenience |
The recommendation: let Steam's bundled stable Proton handle most games, fall back to Proton Experimental for anything new or broken, and install one recent Proton-GE via ProtonPlus as the universal fallback. That covers nearly every "ProtonDB says use GE" case.
The Proton-CachyOS / x86-64-v4 caveat
Margine does not require Proton-CachyOS — Proton-GE is the safe default and covers essentially everything. And note the naming clash: the CachyOS kernel Margine ships (BORE scheduler) is unrelated to the Proton-CachyOS runtime — running the kernel neither needs nor implies the Proton build.
Proton-CachyOS is built per CPU feature level. A build compiled for a level your CPU lacks crashes with illegal-instruction errors — and these tools can fail silently. Always check your level first:
/lib64/ld-linux-x86-64.so.2 --help | grep x86-64-vLines marked (supported) are what your CPU can run; pick the highest. Most CPUs top out at v3; only Zen 4+ and some server parts truly run v4 (a modern AMD Zen 4 chip, for instance, reports v2/v3/v4 with AVX-512 present, while Intel fused AVX-512 off on consumer chips from 12th gen on, so those report at most v3). Upstream stopped building the v4 variant in April 2026 ("wasn't offering anything substantial"), so the current tiers are x86_64 (baseline, runs anywhere) and x86_64_v3 (needs AVX2 — true of essentially every modern CPU). You may still see a stale x86_64_v4 entry in ProtonPlus's list; it's no longer updated, so pick x86_64_v3. Mainstream Valve Proton and Proton-GE are built broadly, so this trap never applies to them.
protontricks — per-game prefix fixes
protontricks is winetricks scoped to Proton. Each Proton game has its own Wine prefix (~/.local/share/Steam/steamapps/compatdata/<appid>/pfx); protontricks finds it by App ID and lets you install a missing Windows runtime or poke the registry in that one game's prefix — the classic cure for garbled text (missing fonts), instant crashes (missing VC++ redist), or black cutscenes (missing media foundation).
You rarely need it: Proton already bundles DXVK/VKD3D and most redists — reach for it only when a ProtonDB report tells you to. Like ProtonPlus, it's a Flatpak (com.github.Matoking.protontricks) by design and that's correct — no maintained RPM. On Margine the usual native-Steam-meets-sandboxed-tool trap is already solved: its Flatpak already has access to ~/.steam and ~/.local/share/Steam, so it sees your real library and prefixes with nothing to configure.
GUI way (the normal way): open Protontricks from Activities (search "Protontricks"). It opens a window listing your installed games — pick the game, then pick the action: "Install an application" for a verb like vcrun2022 or corefonts, or "Run an arbitrary executable" / the default winetricks GUI to reach regedit/winecfg inside that one game's prefix. No commands.
To run a downloaded mod installer / patcher / save editor in a game's prefix, the GUI route is your file manager: right-click the .exe → Open With → Protontricks Launcher → choose the game. (That entry registers itself the first time you open Protontricks.)
Terminal equivalents (optional):
flatpak run com.github.Matoking.protontricks --gui                       # the GUI picker
flatpak run com.github.Matoking.protontricks <appid> vcrun2022 corefonts # by App ID
flatpak run --command=protontricks-launch com.github.Matoking.protontricks --appid <appid> /path/to/installer.exe
A Steam library on a secondary drive is the one case needing a one-time grant — easiest in Flatseal (a GUI: give Protontricks access to the drive), or flatpak override --user --filesystem=/mnt/games com.github.Matoking.protontricks.
Heroic and Bottles — beyond Steam
The decision rule: Steam game → Steam. Epic/GOG/Amazon game → Heroic. A loose Windows .exe → Bottles. Both are Flatpaks on Margine for the same reason as protontricks/ProtonPlus — no native RPM — which is expected, not a defect.
- Heroic Games Launcher is the launcher for the non-Steam PC stores: Epic, GOG, and Amazon Prime Gaming. It logs into those accounts, downloads your library, and runs games through Proton (you can point it at GE-Proton too), with cloud saves and achievements. Use it for your free Epic weeklies, DRM-free GOG titles, and Amazon giveaways. It does not touch Steam games.
- Bottles is a general-purpose Wine-prefix manager, not a store client. It builds isolated, configurable Wine environments for arbitrary Windows software — a
setup.exeyou downloaded by hand, an old indie game, a Windows utility — each in its own clean prefix with its own DXVK/VKD3D choices. The most flexible and most manual of the three; use it when there's no store integration to lean on.
Common gaming issues — quick checklist
- Controller not detected → unplug, wait 5 s, replug; if a Bluetooth controller, repair from Settings → Bluetooth.
- No audio in a Proton game → in Steam's Properties → Compatibility, force a specific Proton version (Proton 9 or GE-Proton are usually safer than "Steam Linux Runtime").
- Stuttering inside GNOME → wrap with
gamescope --: removes the compositor in the loop. - Anti-cheat refuses to launch → check areweanticheatyet.com for the game's Linux status. Some kernel-level anti-cheats simply don't work on Linux yet (Vanguard, recent BattlEye configs).
- FPS lower than expected → confirm GameMode is active (
gamemoded -s), check tuned profile is "Performance" not "Power Saver", check MangoHud isn't reporting a 100 % CPU on a single thread (typical sign that the game is CPU-bound, not GPU-bound). CPU-bound with background load? Tryscx_lavdfrom the scheduler picker.